The LiveReports Designer page
PERMISSIONS Users with security levels that allow the creation of LiveReports. Any security level in Autotask can be configured with this permission. Refer to Configure access to LiveReports Designer.
NAVIGATION Left Navigation Menu > Admin > Admin Categories > Features & Settings > LiveReports > LiveReports Designer.
Non-Administrators with LiveReports Designer access can open the page from Left Navigation Menu > Reports > LiveReports > LiveReports Designer.
On the LiveReports Designer page, you create, edit and manage LiveReports and the folders used to organize them. To open the page, use the path(s) in the Security and navigation section above. This page always opens in a separate window, with the folder tree displayed.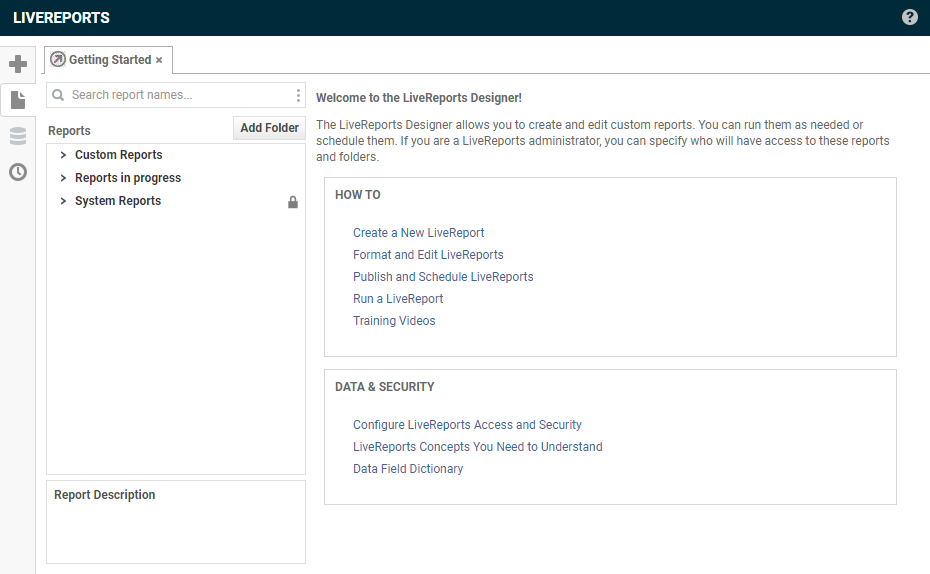
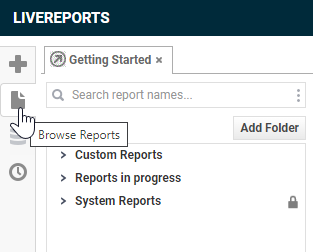
- Click Browse Reports to open or close the folder tree.
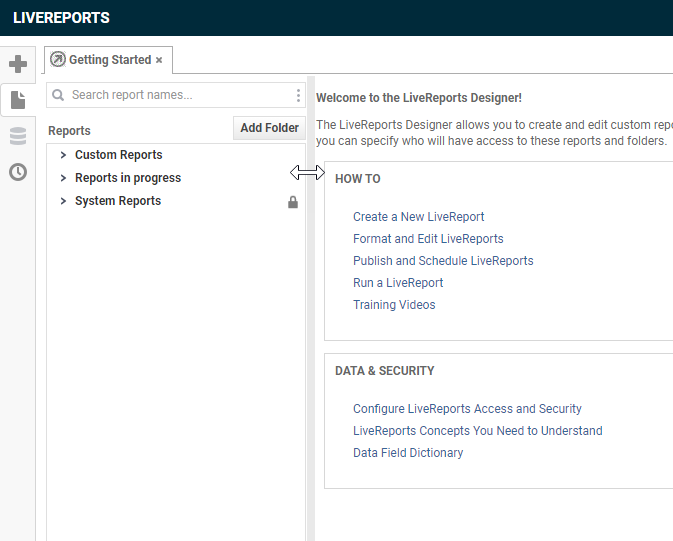
- To change the width of the folder tree pane, click to the right of the pane and drag the divider.
On the main workspace, the Getting Started tab displays links to the most important Help topics.
NOTE You can also click the Help icon in the top right corner, but note that for technical reasons, context-sensitive help is not available in LiveReports.
How to...
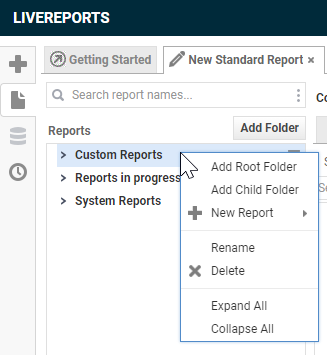
The ability to create and manage report folders is tied to your security level. If you can create your own folders, you will see the Add Folder option above the folder tree and the folder management options in the folder right-click and context menus.
Refer to Can manage LiveReports folders.
IMPORTANT Other users may have access to your report folders. Refer to Configure user access to report folders.
Choose one of the following options:
| Folder Management Option | Description |
|---|---|
| Add Folder | Click Add Folder, or click the context menu or right-click a folder name and select Add Root Folder. A folder is inserted at the top of the folder tree. Replace the default name with the folder name and press Enter or click outside the field. The new folder will appear alphabetically in the folder list. |
| Add Child Folder | Right-click an existing folder or click the context menu and select Add Child Folder. An indented new folder is inserted below the existing folder. Replace the default name with the folder name and press Enter or click outside the field. The new folder will appear alphabetically in the child folder list. |
| Move Folder to Root |
Right-click a child folder or click the context menu and select Move Folder to Root. |
| Rename | Right-click a folder or click the context menu and select Rename. The folder name is selected and highlighted. Enter a new name. |
| Delete | Right-click a folder or click the context menu and select Delete. In the dialog box, click OK. NOTE You cannot delete a folder if it contains a report or a child folder. |
NOTE Read-only folders cannot be modified, but you can copy them and edit the copy.
You can search for reports by name, or name and description.
- To search by name, enter part of the name into the Search field. The report list updates to display the reports that contain the search string in the report name.
- To also search the Description field, click the More icon
 in the search bar and select Include Description (slower). The prompt changes to Search report names/descriptions. Press Enter to search. To switch back to Name only search, click the icon and select Search by name.
To create a new custom report, click the plus sign in the top left corner and select Standard Report or Express Report.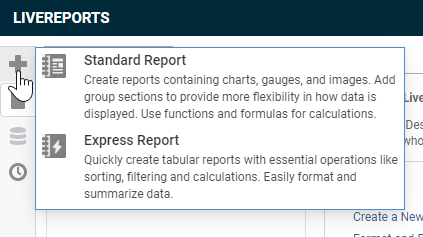
Refer to Creating a new LiveReport
If you click a report, the report description is displayed below the folder list. You access report management options by right-clicking on a report in the folder tree, or by clicking on the context menu.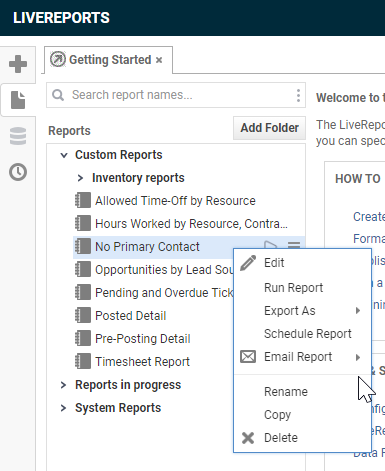
You'll see the following options:
| Name | Description |
|---|---|
| Edit | Format and edit the selected report. For more information, refer to Formatting and editing LiveReports. |
| Run Report | Click this button to execute the selected report in the default format. Refer to Run a LiveReport from the LiveReports Designer menu. |
| Export As |
Click the drop-down menu to export this report to Excel (.xlsx), PDF, RTF or CSV format. For more information, refer to Running a LiveReport. NOTE If you select the CSV export format, UTF-8 encoding will be used. |
| Schedule Report | Click to create a schedule for automatically running the report and emailing it to selected recipients. Refer to Scheduling LiveReports. |
| Email Report (with email entry field and format selector) | Emails the LiveReport to the email address you specify. The email address is stored as a cookie in your browser. The report is attached to the email as the file type that you select from the Export Type drop-down menu. Click the icon and enter the email address in the input field. Select the format of the report. The report is immediately queued to execute and will be emailed as soon as it is generated. If there are numerous reports scheduled to execute at the same time, there could be a delay before the report is generated. NOTE HTML is not an export option when emailing a report. |
| Rename | Click to put the report name into edit mode and enter a new name. |
| Copy | Select an existing report, click Copy and select a folder to place it in. Use copy to create modified versions of System Reports, which cannot be edited. |
| Delete | Deletes the selected report. You will be prompted to confirm your deletion. |
Users with Manage Scheduled Reports permissions can monitor and remove report schedules from the Schedule Reports tab. The tab displays the list of scheduled reports, the last time they were run, the next time they will be run, and other options. You can also flush all completed or deleted schedules from the list and delete a specific schedule.
TIP Click the column header to sort by this column.
NOTE You can only access the Manage Scheduled Reports option from the schedule report icon on the main page of LiveReports Designer.
| Name | Description |
|---|---|
| Search schedules | You can search scheduled reports by entering a string contained in the user ID, schedule name or report name. |
| Refresh | Updates the list of scheduled reports. |
| Flush | Removes all completed or deleted jobs. |
| User ID | The name of the resource who created or last saved edits to the schedule. NOTE You can configure a system setting that informs you when a scheduled report fails to run because the scheduler was set to inactive. Refer to Inactive LiveReport Schedule Notification. |
| Schedule Name | Name of the schedule. |
| Type | The type of schedule. Once, Daily, Weekly, Monthly and Yearly are available. |
| Report Name | Name of the report that has been scheduled. |
| Last Run Date | The last date that the scheduled report was run. |
| Next Run Date | The next date the scheduled report will run. |
| Status | Displays the status of the schedule. The column will display Ready if the schedule is ready to run again or Completed if it has been executed and will not run again. If the status is Abended, that is, the report crashed, you can edit the schedule and click Finish to save it. It will return to Ready status. |
| Run Count | Displays the number of times the scheduled report has run. |
| Edit Row |
Opens the Schedule Report Wizard so you can edit any of the options. NOTE You can edit schedules that have run. The resource who edits the schedule will become its new owner, and their name will be shown in the Resource column. |
| Delete Row |
Deletes the selected schedule. |
