Transferring emails to Autotask
When you install the Outlook Extension, email integration is enabled by default and cannot be disabled. With the Outlook extension enabled, you can do the following with Outlook emails:
- Save an email as a new ticket
- Save an email as a note that can be attached to an existing company, contact, ticket, project, or task
- Create new tickets and notes from Outlook, without converting an email
- Save a new email message you are composing as a CRM note in Autotask
In all cases, the pages and forms that open are the same ones that would open if you switched to Autotask.
NOTE When you initiate an action that causes you to access Autotask, you will need to authenticate, unless you are already logged into Autotask on the same device.
To save an Outlook email as a new Autotask ticket, do the following:
- In any Outlook mail folder, select the email that you would like to convert into a ticket.
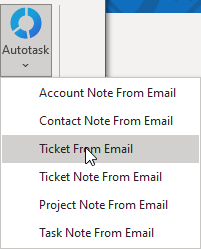
- On the Autotask menu, in the Create from Email group, select Ticket.

The New Ticket page opens. - If the email you are converting to a ticket has a file attachments, you can transfer the file attachments to Autotask, as well. Refer to Transferring email attachments.
-
If the email is located in one of the Outlook system folders (Inbox, Sent Items, Outbox, or Drafts), the Outlook Extension can determine the matching company and contact from the email address of the sender.
- If the address matches an address associated with only one company in Autotask, the Company Name and Contact Name fields will be populated.
- If the address is associated with multiple organizations, you must manually select which company to associate the ticket to.
- If a matching email address is not found or the email is located in a custom folder, Autotask won't be able to determine if you want to use the sender or receiver as the Ticket Contact or Note Contact, and the Company Name and Contact Name fields will be left blank. You must manually select an organization (and optionally a contact) name to associate the ticket or note with.
- If the address matches an address associated with only one company in Autotask, the Company Name and Contact Name fields will be populated.
- The New Ticket page opens. The Source field defaults to Email, the text of the email populates the Description field, and the email subject line displays in the Ticket Title field.
NOTE If the source named "Email" has been edited, the Source field defaults to the field's current name. If "Email " has been deleted, the field defaults to the ticket category's default source. If the category has no default source specified, the field defaults to the system default ticket source.
- Complete all required fields. Refer to Adding, copying, and editing tickets for details.
- Click Save to save the ticket in Autotask.
To convert an email message to a CRM note, ticket note, project note, or task note, do the following:
- Highlight an email message and, on the Autotask menu, in the Create from Email group, click one of the following items to associate the note with:
- Company Note
- Contact Note
- More > Ticket Note
- More > Project Note
- More > Task Note
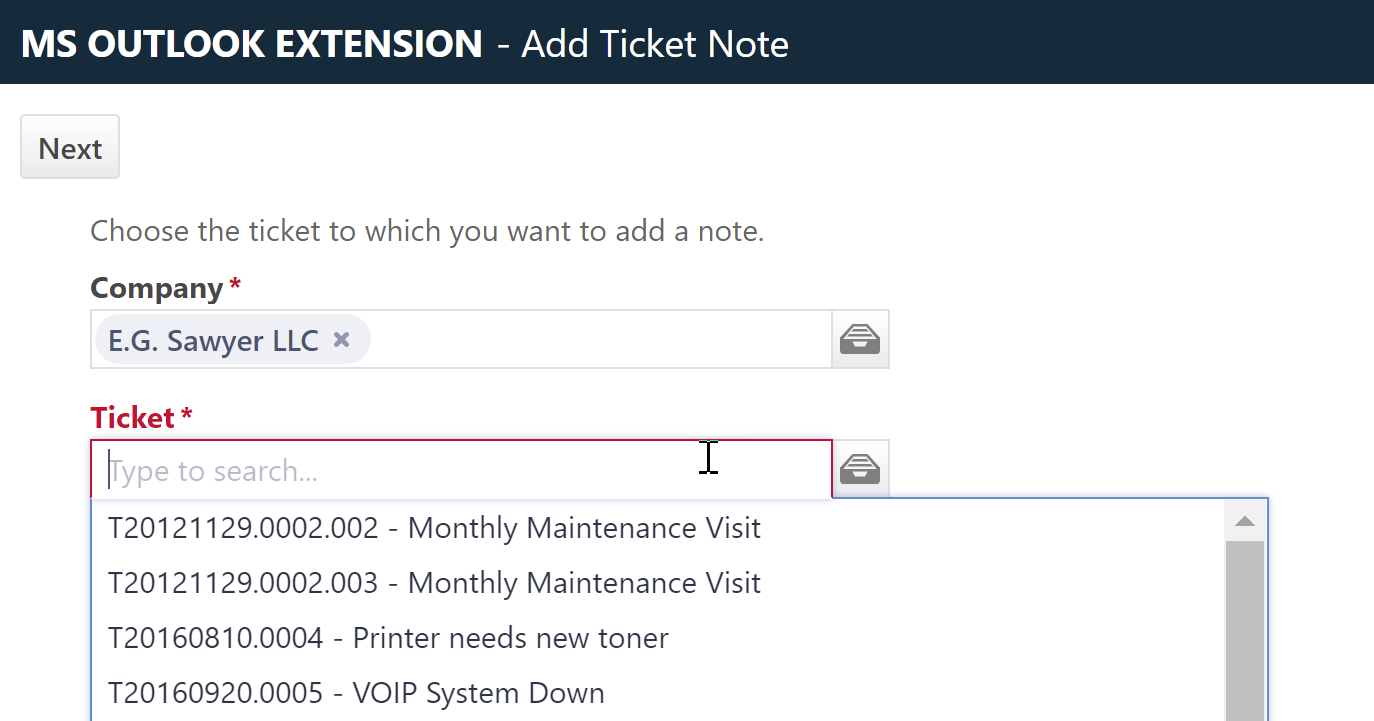
- For ticket, project, and task notes, a dialog box will appear and prompt you to select first the Company, for tasks the Project, and then the Ticket or Task you want to associate the note with.

Click Next. - The Add [Entity] Note page will open. The email subject is converted to the note title, and the body of the email to the note description. The note description field has a limit of 32,000 characters. Any additional characters from the email body will be truncated.
- Complete additional required fields and click Save & Close to save the note to in Autotask.
- For information on adding CRM notes, refer to Adding or editing CRM (organization, contact, or opportunity) notes.
- For information on adding notes to projects, refer to Adding or editing project or project phase notes.
- For task and ticket notes, refer to Adding a note to a task or ticket.
- If the email you are converting to a note has a file attachments, you have the option to transfer the file attachments to Autotask, as well. For more information, refer to Transferring email attachments.
To create a ticket:
- In Outlook, go to Autotask > Add to Autotask group > Ticket.
- The New Ticket window will open.
Refer to Adding, copying, and editing tickets.
In addition to converting email messages to notes for various Autotask entities, you can simply create new Autotask notes from within Outlook, without logging into Autotask.
- On the Autotask tab ribbon in Outlook, in the Add to Autotask group, click to select one of the following:
- Account Note
- Contact Note
- More > Ticket Note
- More > Project Note
- More > Task Note
- Complete the fields in the New [Entity] Note, and then click Save.
NOTE If you have Calendar Integration enabled, saving a CRM Note might trigger an automatic calendar item synchronization. If the Action Type of the CRM Note is Calendar or Both, the CRM Note will appear in your Outlook calendar. Refer to Action types.
To create a new email and save it as a CRM note to Autotask, do the following:
The email is sent, and Autotask checks if there are existing contacts in Autotask whose email address matches the email address(es) in the To: field. The email is attached as a CRM note to all matching contacts, and appears on the Notes tab of the Company and Contact pages.
NOTE Autotask will only look at the To line. CC and BCC email addresses will be ignored.
The Outlook message fields are mapped to Autotask as follows:
| Outlook Message | Autotask Note |
|---|---|
| Email sent date | Start Date |
| Email sent time | Start Time |
| Email sent date + 15 minutes | End Date |
| Email sent time + 15 minutes | End Time |
| Email from (sender) | Assigned To |
| Email subject <line break> Email body | Note Description |
| Action Type will always be "Note" | |
| Opportunity Name will always be blank | |
| All fields in the Follow-up To-Do section will always be blank |
NOTE Attachments, images and HTML formatting will not be carried over to Autotask.
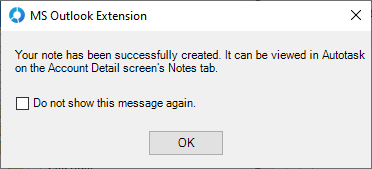
- If the note is successfully created in Autotask and the Display "Success" message when a note is successfully created using the Send to Autotask button is enabled, the following information box will appear:
- Click OK to proceed.
TIP If you check the Do not show this message again check box, and a note fails to be created, an alert message will still let you know.
When you convert an email with a file attachment to a ticket or a note, you can optionally also save the file attachment to Autotask.
To transfer an email attachment to Autotask, do the following:
- Open an email with a file attachment.
- Click the Autotask menu and select an option.

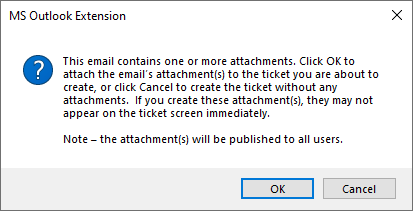
- A dialog box opens, asking you if you want to attach the email's attachments to the ticket or note you are creating in Autotask.
- If you click OK, any file attachments to the email and images embedded in the body will be attached to the ticket or note. The Attachment Type will always be Attachment, meaning the attachment will be uploaded to the Autotask file server. The Name will be the file name. The attachment will always be published to All Autotask Users.
IMPORTANT Notes containing attachments that are added to a ticket via the Outlook Extension will be visible to all Autotask users with access to the ticket.
- If you click Cancel, the ticket will be created, but the attachments will not be transferred to Autotask.


