Configuring settings for individual clients
PERMISSIONS Security level with Admin permission to configure Client Portal & Taskfire. Refer to Admin security settings.
NAVIGATION Left Navigation Menu > Admin > Admin Categories > Extensions & Integrations > Client Portal & Taskfire > Manage Client Portal Organizations > click an organization name
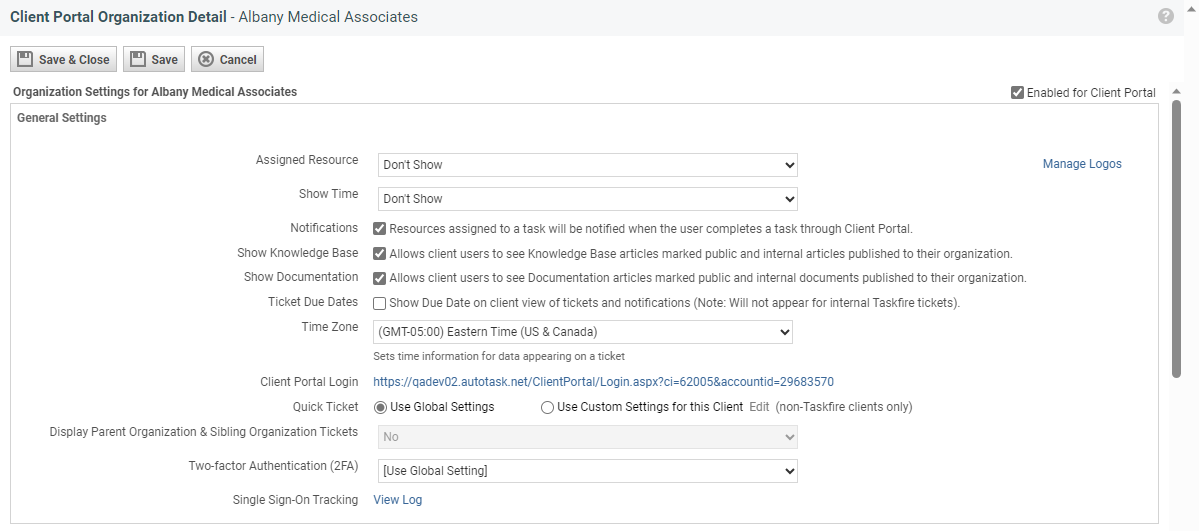
On the Client Portal Organization Detail page, you can customize Client Portal settings for an individual organization. To open the page, use the path(s) in the Security and navigation section above.
In the top right corner of this page, you will see the Enabled for Client Portal check box. Since the portal is enabled for all active customers at the organizational level, this check box is selected by default.
- To turn off access to the Client Portal for all users, clear the Enabled for Client Portal check box.
- If Taskfire is enabled, the check box is read-only. You must disable Taskfire first. Refer to Disable Taskfire.
You can enable the Client Portal and Taskfire for your local organization (organization ID zero) for demonstration and training purposes. You will not be billed for any Taskfire licenses.
| Field | Description |
|---|---|
|
Assigned Resource
|
The option you select here controls how resource names will appear to Client Portal users when viewing tickets (including work history), tasks, and the projects summary page:
NOTE Billing organization users will always see the resource names in the Client Portal, regardless of these settings. For information on billing organizations, refer to Using contracts to bill another organization. |
| Show Time |
Customize how worked hours appear on tickets and tasks in the Client Portal. You can choose not to show any time, to show only hours that have already been billed, or to show the number of worked hours on tasks or tickets. NOTE This information will only be visible to Taskfire users. NOTE Billing organization users will always see billed hours in the Client Portal, regardless of these settings. |
| Notifications | An email notification will be sent to your assigned resources when notes are added and tasks are completed through the Client Portal. This setting is enabled by default. |
|
These settings control whether this organization's Client Portal users can view knowledge base articles and documents that have been published to their organization, to all organizations, or (for articles) to a territory or organization classification to which they belong. Refer to Publish To for details on publishing articles, and Adding and editing documents for details on publishing articles. NOTE Client Portal and Taskfire security levels include settings that separately enable access to Knowledge Base articles and documents. All system Client Portal security levels are configured to allow access. For information on editing custom security levels, refer to Adding or editing Client Portal security levels. |
|
| Ticket Due Dates | Select this option to show the ticket due date you have set for the ticket on the client ticket view in Client Portal and in notifications related to the ticket. This date will appear in the client ticket's Service Provider Due Date field. NOTE For Taskfire tickets, the due date will only show on shared tickets that have been transferred to you from the client, or that you created and transferred to Taskfire. |
| Time Zone | Select the time zone that should be used when viewing time on tasks and tickets in the Client Portal and for time stamps on tickets and tasks. For organizations in North America, the default time zone is based on the client's address. For international organizations, the default is based on the Headquarters internal location in Left Navigation Menu > Admin > Admin Categories > Organization Settings & Users > Your Organization > Internal Locations tab. The default can be edited. |
| Client Portal Login |
The Client Portal Login URL launches the customer's Client Portal log in page in a new browser window. NOTE Only the "friendly" URL will display any custom logos or even custom logos for specific customers. The logo for the old URL is "Powered by Datto." If you have uploaded custom logos for this customer, direct them to this URL to log in rather than your generic Client Portal log in page so that the custom logos are displayed. NOTE If an Identity Provider has been configured for the client, the Login page may be bypassed. Refer to Setting up a custom Identity Provider. |
| Quick Ticket |
Use the radio buttons to manage the behavior of the Quick Ticket feature for this client. Leave the default, Use Global Settings to use the ticket settings configured on the Global Settings page. Refer to Manage Global Quick Ticket Settings (non-Taskfire Clients only). For details, refer to Enabling and configuring Quick Ticket settings by client. |
| Display Parent Organization & Sibling Organization Tickets | Use this setting to allow Taskfire or Taskfire and Client Portal users who belong to sub-organizations to see and work on tickets for their parent organization and sibling organizations. The default setting is No. |
|
Two-factor Authentication (2FA) |
This setting defaults to the global two-factor authentication requirements. Refer to Two-factor Authentication (2FA) (Global default). You can modify the setting for the current organization. The following options are available:
|
|
Single Sign-On Tracking |
Click View Log to open the Single Sign-On Log table view that will show all single sign-on events for the organization for the last 30 days. Refer to The Single Sign-On Log. |
| Manage Logos | Click this link to customize the Client Portal logo for the client. Refer to Customizing logos for individual clients. |
To set your client up with their own internal helpdesk, click Enable Taskfire. Refer to Configuring Taskfire for a client.
This section lets you determine which service request types your client can select.
- All allows the client to select from all active service request types you have created for Client Portal users. Refer to Managing service request types.
- Custom allows you to specify the active service request types available to the client.
We are gradually rolling out a new version of the Client Portal. If you have enabled this feature on the Admin > Activations page, you can make it available on a client-by-client basis and configure certain settings.
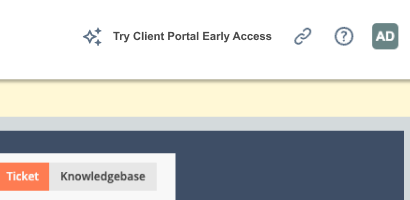
When you do, the individual client user can choose to remain in the legacy portal or explore the new one. At the top of the Client Portal, clients will see a Try Client Portal Early Access button. If they click the button, they will be taken to the new portal.
|
Field or setting |
Description |
|---|---|
|
Enable Client Portal Early Access |
Select the check box to enable early access for this client. When you check the setting, the two additional settings below will appear. |
|
If this check box is selected, client users will only log in to and have access to the early access portal. The Default First Time Client Portal Experience field will be disabled and set to the Client Portal Early Access option. NOTE This means that users will only have access to the features that are currently supported in the new Client Portal. |
|
|
Default First Time Client Portal Experience |
This field is enabled if Prevent access to Legacy Client Portal is cleared. Click the dropdown control and select an option.
With this setting, you control the first impression client users will have when accessing the Client Portal. Each individual user can still select their own default option. |
When Autotask activates the Client Portal for you, all active customer organizations are enabled by default. However, the contacts are disabled by default. To provide one of your clients with access to the portal, you must activate at least one contact at the client site.
In the Manage users for this client section, you can do the following:
| Option | Description |
|---|---|
|
New Contact |
Click this button to add a new contact to the client organization. Refer to Adding and editing contacts. |
|
Activate Client Portal Login link in the Security Level column |
Clicking this link will open the Edit Contact page for the selected contact. To activate the Client Portal, click the Client Portal tab on the accessory tabs. Refer to The Client Portal tab. |
|
Right-click table menu |
|
|
Edit Contact |
This option will open the Edit Contact page. Refer to Adding and editing contacts. |
|
Preview Client Portal |
IMPORTANT For security reasons, we have removed this feature. Please open the Contact page and preview the Client Portal from Tools > Preview Client Portal as this Contact. |
IMPORTANT While only customer contacts can have access to Client Portal, parent organization contacts can create tickets in Client Portal for sub-organizations, even if the sub-organization is not set up as a customer organization.


