Adding logos to your Client Portal
PERMISSIONS Security level with Admin permission to configure Client Portal & Taskfire. Refer to Admin security settings.
NAVIGATION Left Navigation Menu > Admin > Admin Categories > Extensions & Integrations > Client Portal & Taskfire > Logos
Your Client Portal can be branded by adding logos to the portal's login page and the top menu bar of the portal. You can display the same logo to all your clients, or you can display different logos to different clients. To have the logos selected here appear on the login page, you must be using the "friendly" URL option. Refer to Generic Client Portal Login.
NOTE If you do not upload a logo or are not using the "friendly" URL, "Powered by Datto" appears in the top menu bar.
To add your company logos to your Client Portal, do the following:
- To open the page, use the path(s) in the Security and navigation section above.
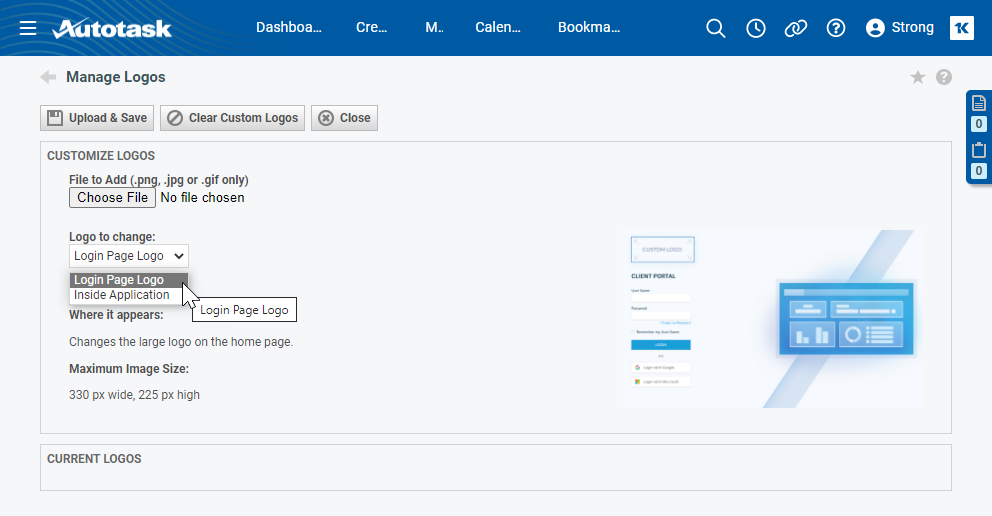
The Manage Logos page opens:
- Click Choose File and navigate to the logo file you would like to add (PNG, JPG and GIF formats are supported). Select the file so it appears in the File to Add text box.
- On the Logo to Change drop-down list, select the logo you would like to change. The preview to the right will show you which logo you are changing, and Where It Appears will indicate where the logo will be displayed.
- Click Upload and Save. The file you uploaded is previewed in the Current Logos section.
- To remove your custom logos, click Clear Custom Logos.
NOTE The Inside Application preview will display the new Client Portal view.
If you want to display different logos to some of your clients, for example, because you provide consulting services on behalf of several partners, do the following:
- Navigate to Left Navigation Menu > Admin > Admin Categories > Extensions & Integrations > Client Portal & Taskfire > Manage Client Portal Organizations > click an organization name > Logos.
The Manage Logo page for the selected customer will appear. - Follow steps 2 - 4 above.
The new logos will be displayed for this client's users only.


