Using Postman to explore the REST API
This article describes the steps to download and configure Postman for communication with the Autotask REST API.
To help you learn how to construct requests to the Autotask REST API, Datto provides a customizable REST API request collection for use with Postman. For more information, refer to Sample requests.
Overview
Postman is a powerful GUI-based platform for browsing and testing APIs without coding. It is available on Windows, macOS, and Linux.
Use Postman if:
- You are new to APIs.
- You want to get familiar with our platform without needing to build code.
- You need a troubleshooting and debugging tool when developing against the API.
Proceed to the next section of this article to learn how to get started with the application. For Postman application support, visit the Postman Support Center (external link).
NOTE The version of Postman shown in the examples is 7.34.0, released on 09 October 2020 for Windows. We recommend that you use this version or later to avoid user interface discrepancies.
To get started with Postman, follow these steps:
- Download Postman from the Get Postman (external link) website and launch the installer application.
- After you complete the installation, run the application.
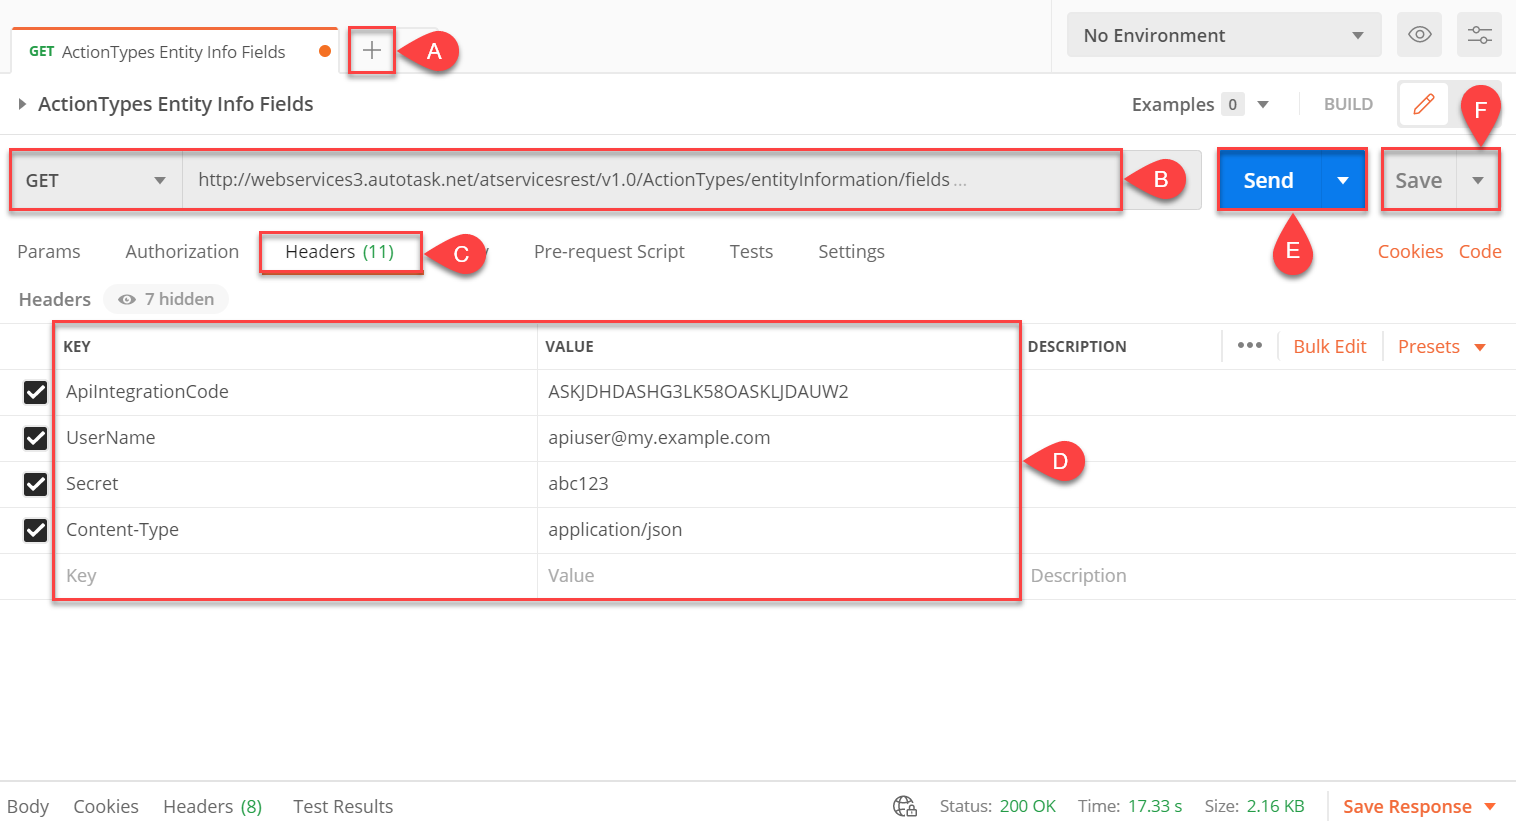
Perform the following actions to build a basic query. Refer to the image shown below for all listed steps.
- Click the + tab to create a new request.
- Enter the API call you'd like to send and the entity path of the desired resource. In the above example, the user is sending a GET request to retrieve field information about the ActionTypes entity.
- Select the Headers tab.
- In the Headers field, add the following keys and values:
- ApiIntegrationCode: Enter your API tracking identifier key.
- UserName: Enter the user name of an API user associated with your implementation.
- Secret: Enter the password for the API user.
- Content-Type: Enter application/json.
- Click Send to transmit your request to the REST API.
- To save the query configuration, click Save.
To learn more about working with Postman, including advanced concepts, visit the Postman Learning Center (external link).
To help you learn how to construct requests to the Autotask REST API, Datto provides a customizable REST API request collection for use with Postman. The examples it contains are for educational purposes only. Datto does not guarantee or warranty their functionality.
The collection is contained in a JSON-formatted file. Before you can begin making test requests, you'll need to import the file into Postman and configure the collection for your environment. To learn how to do so, follow the steps in the following sections of this article.
If you haven't done so already, download and install Postman on a local computer with an available internet connection. Refer to Downloading Postman for more information.
- Visit the Autotask Development GitHub page (external link) to view and download the examples.
- Save the file to a location that's easy for you to remember and access.
- If the collection is contained in an archive format, such as a zip file, extract it.
- Launch Postman and navigate to File > Import.
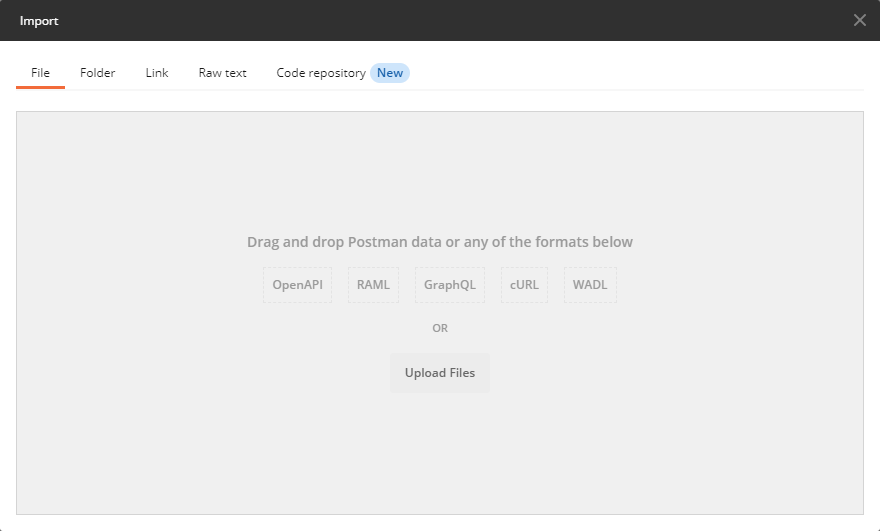
- The Import window will populate. Drag and drop the JSON file you downloaded into the File tab. Alternatively, you can click the Upload Files button and manually navigate to the collection.
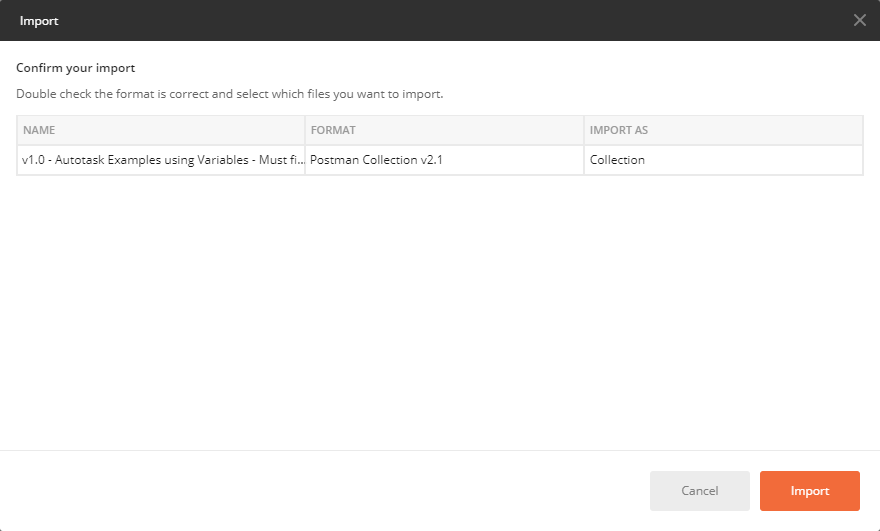
- The Confirm your import screen will appear. Review the information it presents. Then, click Import.
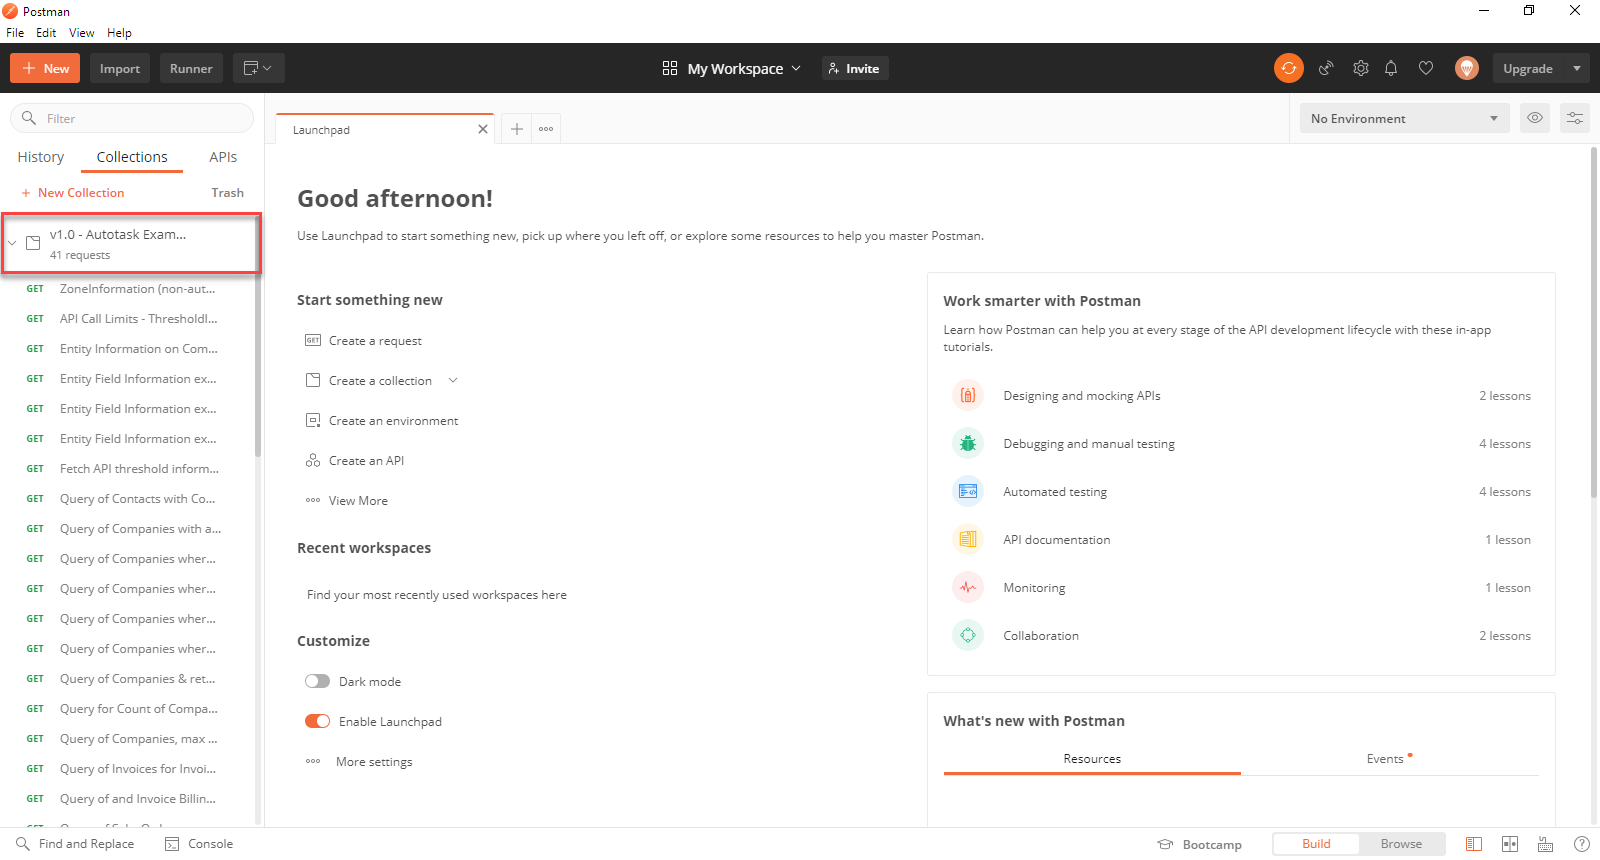
- When the import finishes, you'll see the collection on the Collections tab of Postman's My Workspace view. Click the > icon next to the collection's name to view its contents.
- To make requests to the Autotask REST API, you'll need to set up your collection's variables. Right-click the collection's name. Then, click Edit.
- The Edit Collection window will open. Click the Variables tab.
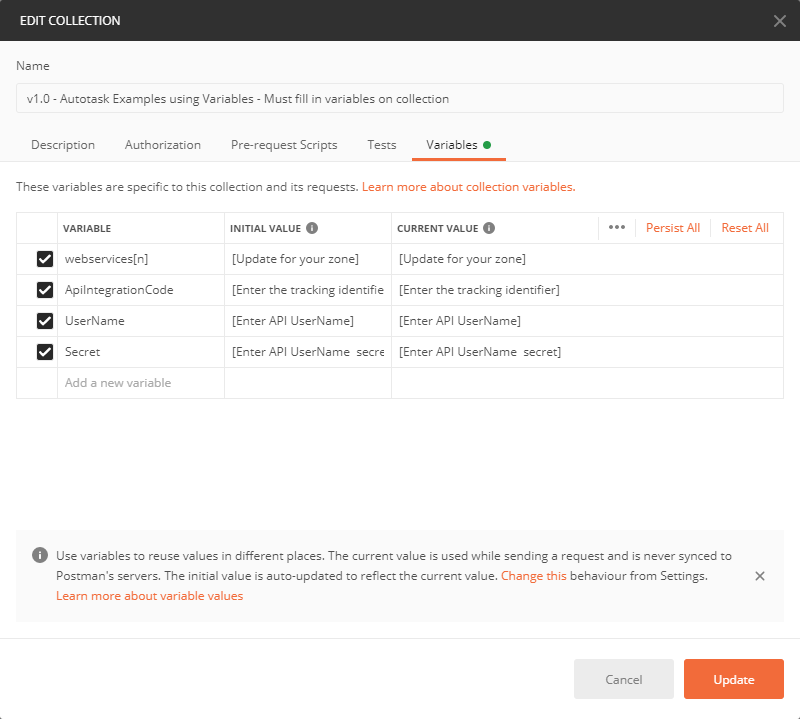
- Edit the following attributes to match your environment:
- webservices[n]: Use the zone where your database is located. For example, a database in the America East zone would use the value of "webservices3" (without quotes). You can find a list of zones at Autotask API zones and WSDL versions.
- ApiIntegrationCode: Enter the custom tracking identifier shown for the account in Autotask on the Resources page at Left Navigation Menu > Admin > Features & Settings > Resources/Users (HR) > Resources/Users (HR) > Resources/Users. Alternatively, enter the API integration code provided to you as a third-party vendor.
- UserName: Enter the API account username shown on the Autotask Resources page.
- Secret: Enter the Password (Secret) value for the API account.
- Click Update. Postman will automatically populate the API request headers for the collection with the information you provided.
NOTE You may also need to update some of the IDs and fields in these examples with your database's information before they'll work. In most cases, any issues you encounter with these requests will relate to information specific to your database or to your API user not having permission to perform the action you are testing.
You're now ready to begin exploring and making API calls. You can use the examples provided in the collection as a syntax reference and as a framework to build your own queries. For further information about working with the REST API, refer to the Additional resources section of this article.
