Creating the Exchange app registration in Microsoft Entra ID or Azure AD
This step is the prerequisite for configuring the Exchange extension in all hosting environments except on-premises.
Microsoft requires multi-factor (OAuth) authentication for Exchange Office 365. You must create an app registration in Microsoft Entra ID or Azure Active Directory. It will supply the synchronization credentials you will need to configure the MS Exchange extension in Autotask. This information is entered into the Synchronization Credentials section on the General tab of the MS Exchange Extension Configuration page. Refer to How to set up the MS Exchange Extension.
IMPORTANT Microsoft is transitioning from Azure AD to Microsoft Entra ID. For the time being, the old navigation and workflows are still available.
For information on Microsoft Entra ID, refer to What is Microsoft Entra ID?
In Microsoft Entra ID or MS Azure AD
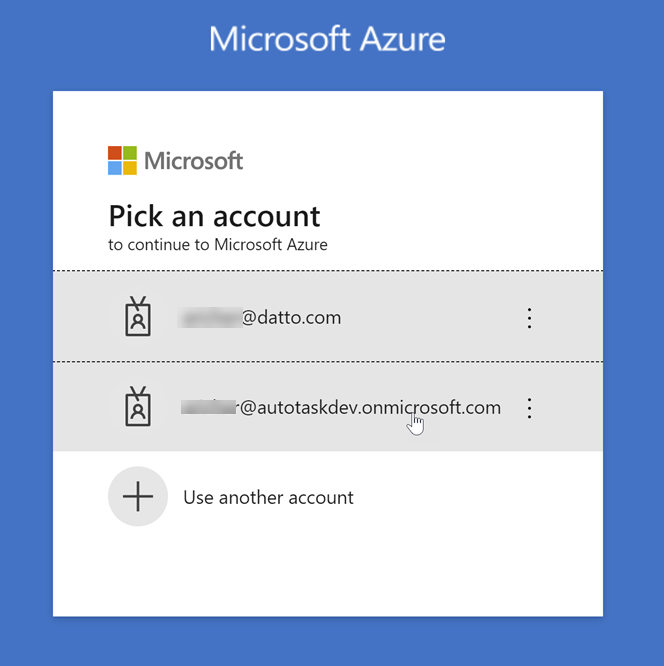
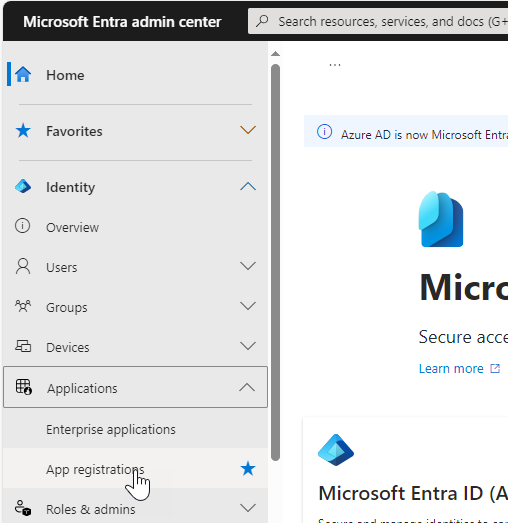
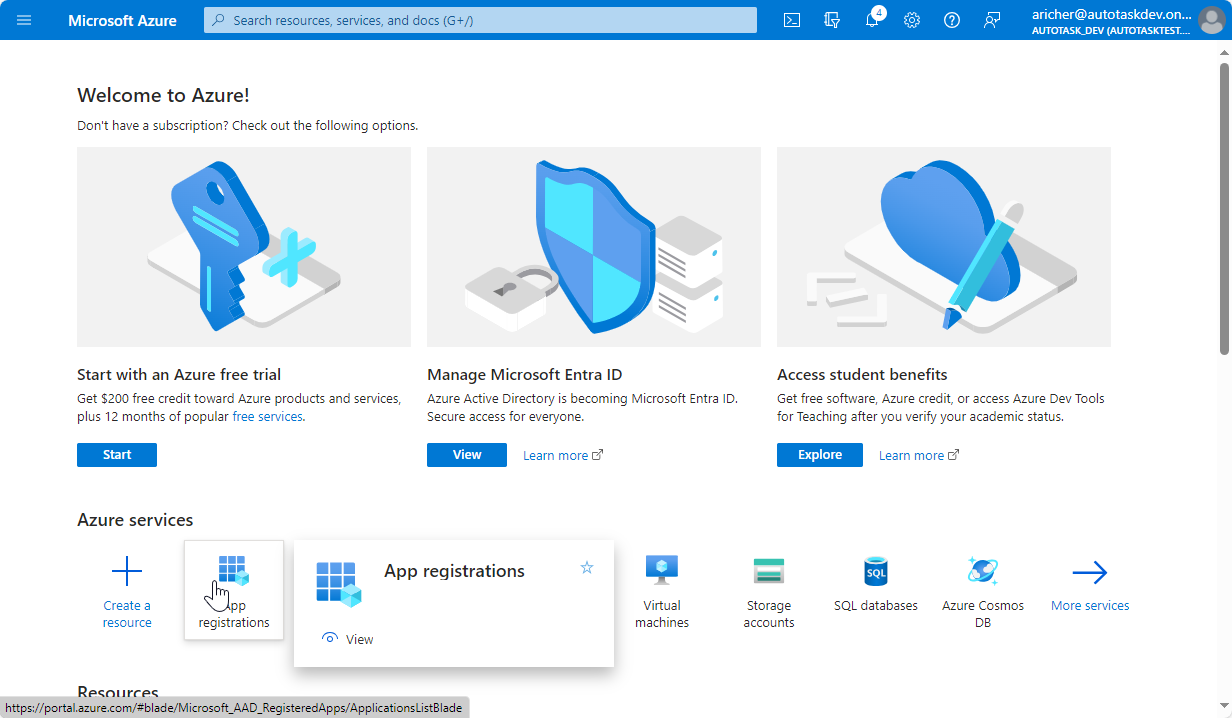
You can access the app registration page from either Microsoft Entra ID or Azure AD.
The app registration workflow is the same in Microsoft Entra ID and Azure AD.
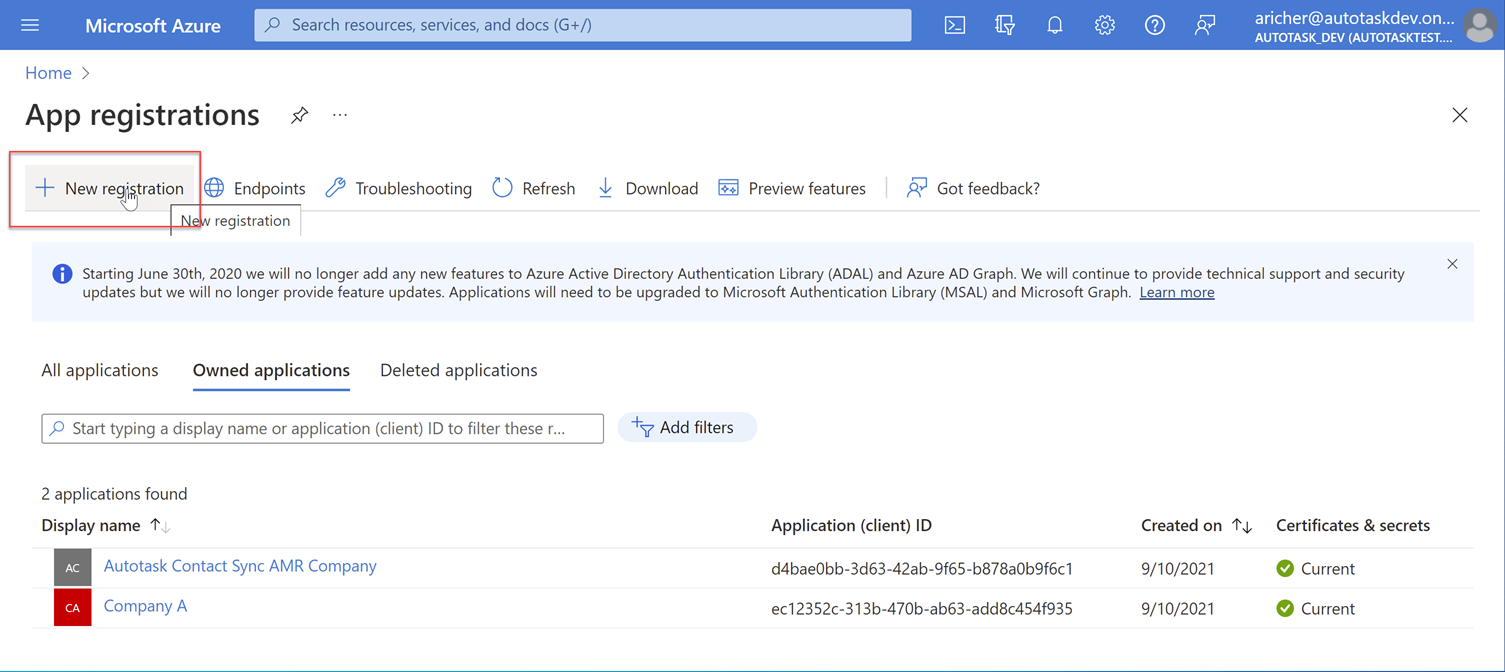
- Click New registration. The Register an application page opens.
- Enter a Name that makes it clear what the app will be used for (such as "Autotask MS Exchange Extension").
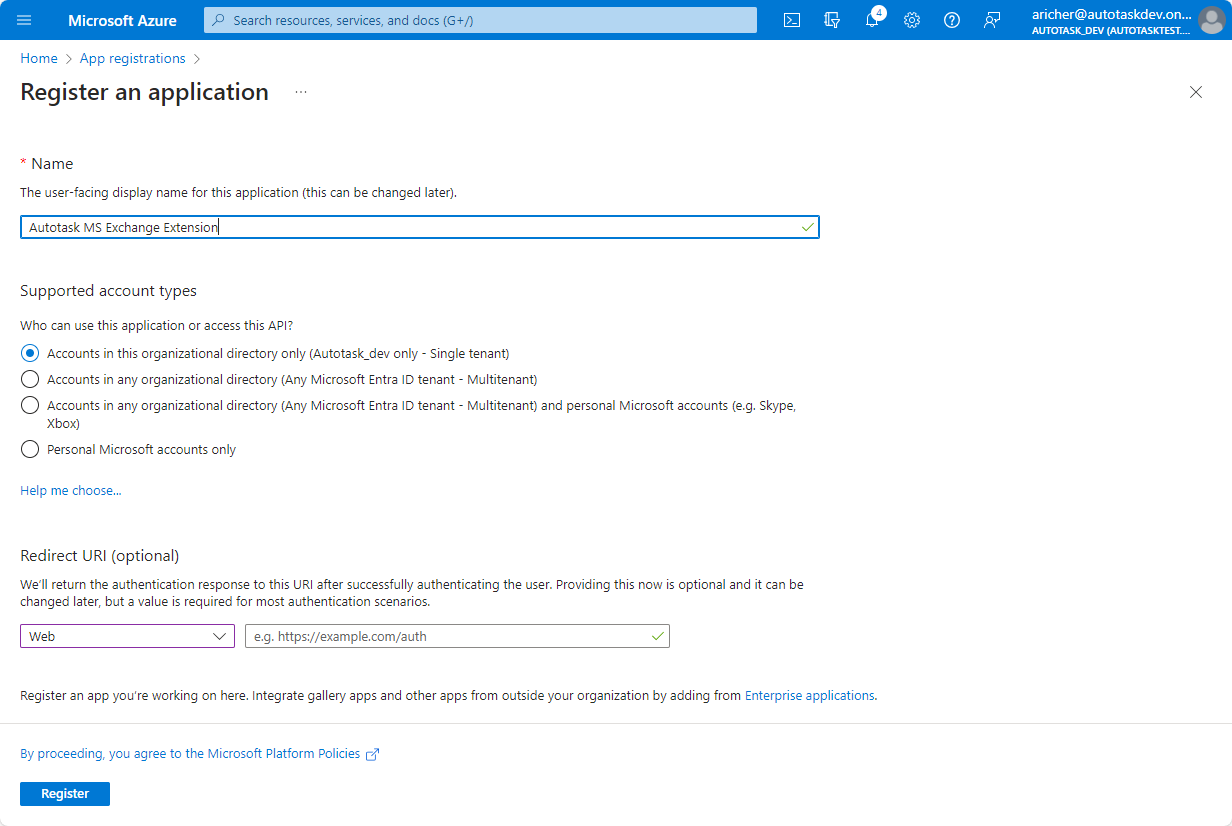
- Under Supported account types, click the Accounts in this organizational directory only (your local organization name) radio button.
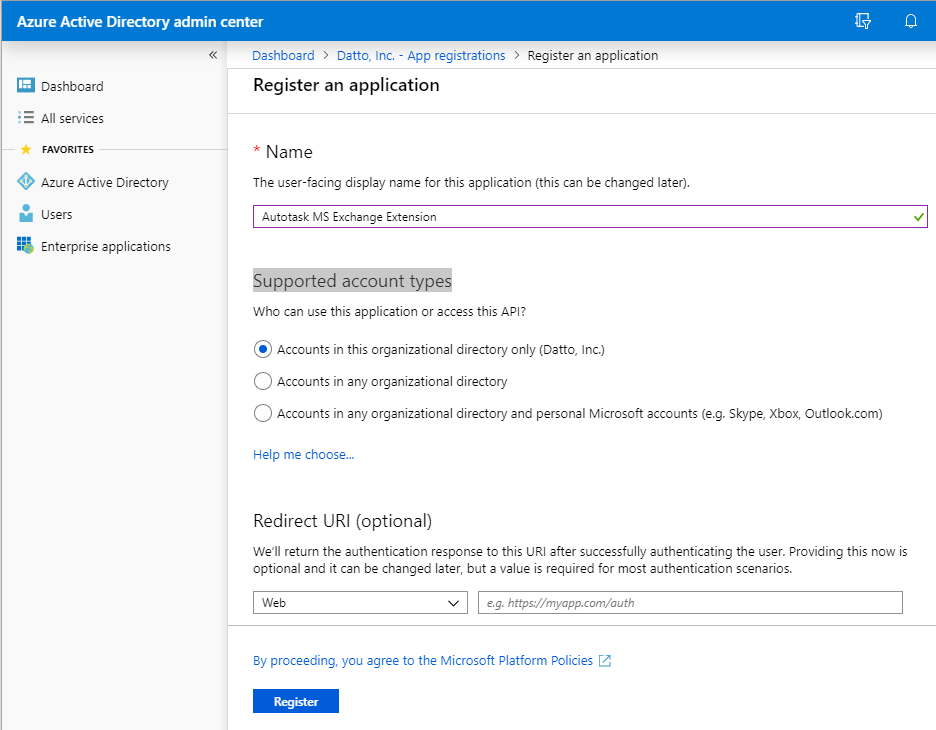
- Click Register. A dialog will pop up to let you know that you successfully created the app, and the page for the new app will open.
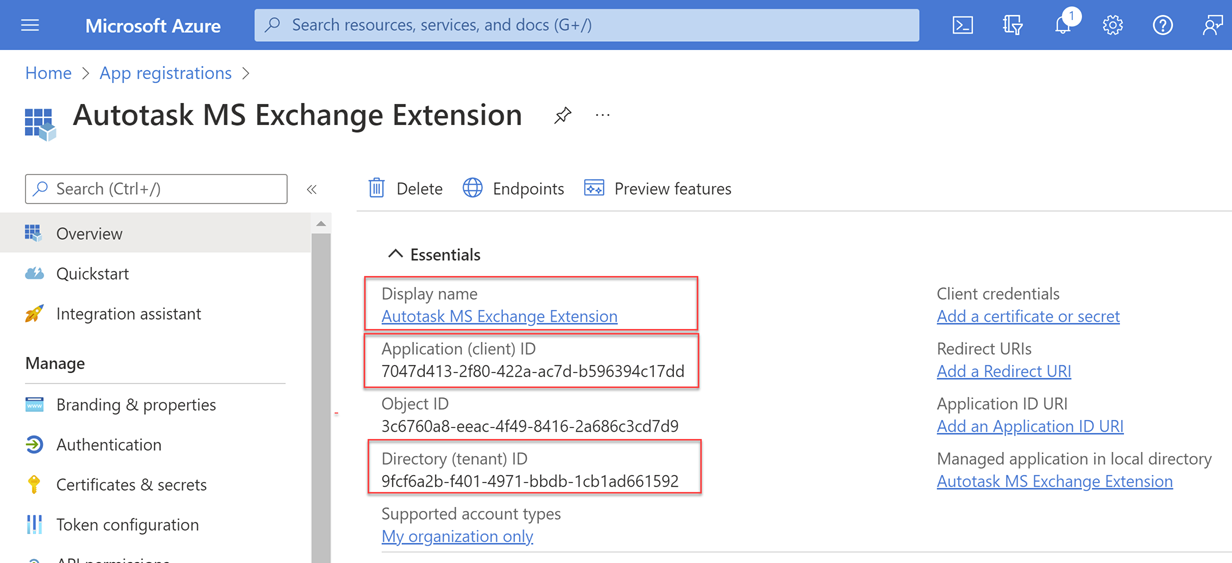
- Right below the Display name, you will see the Application (client) ID and Directory (tenant) ID. Copy these strings into a note for pasting them into the Autotask MS Exchange Configuration page. Refer to Pasting the synchronization credentials into Autotask.
Microsoft recently changed their settings so that new app registrations do not allow public client flows by default. To enable this setting, do the following:
- On the menu, select Manage > Authentication.
- Scroll to the Advanced settings section.
- Under Allow public client flows, click Yes.
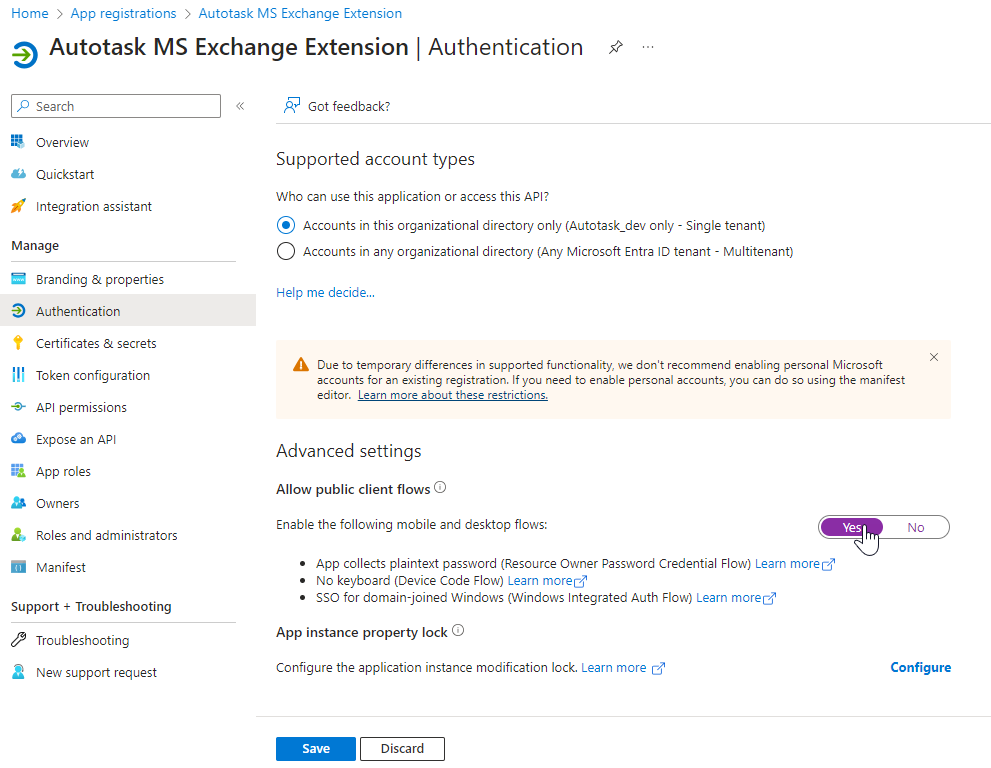
- Click Save.
NOTE You may also enable this setting in the Implicit grant and hybrid flows section by selecting ID tokens (used for implicit and hybrid flows).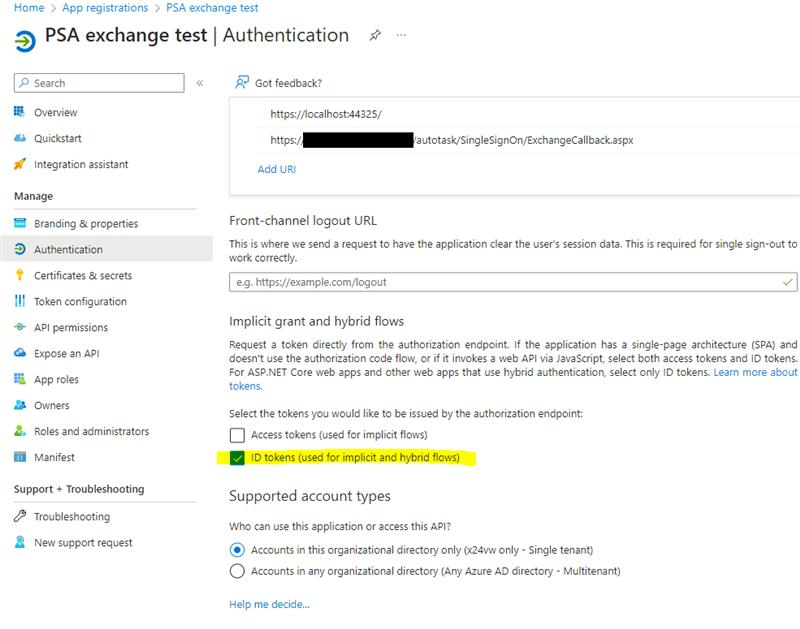
A client secret is a secret string that the application uses to prove its identity when requesting a token. It is also referred to as application password.
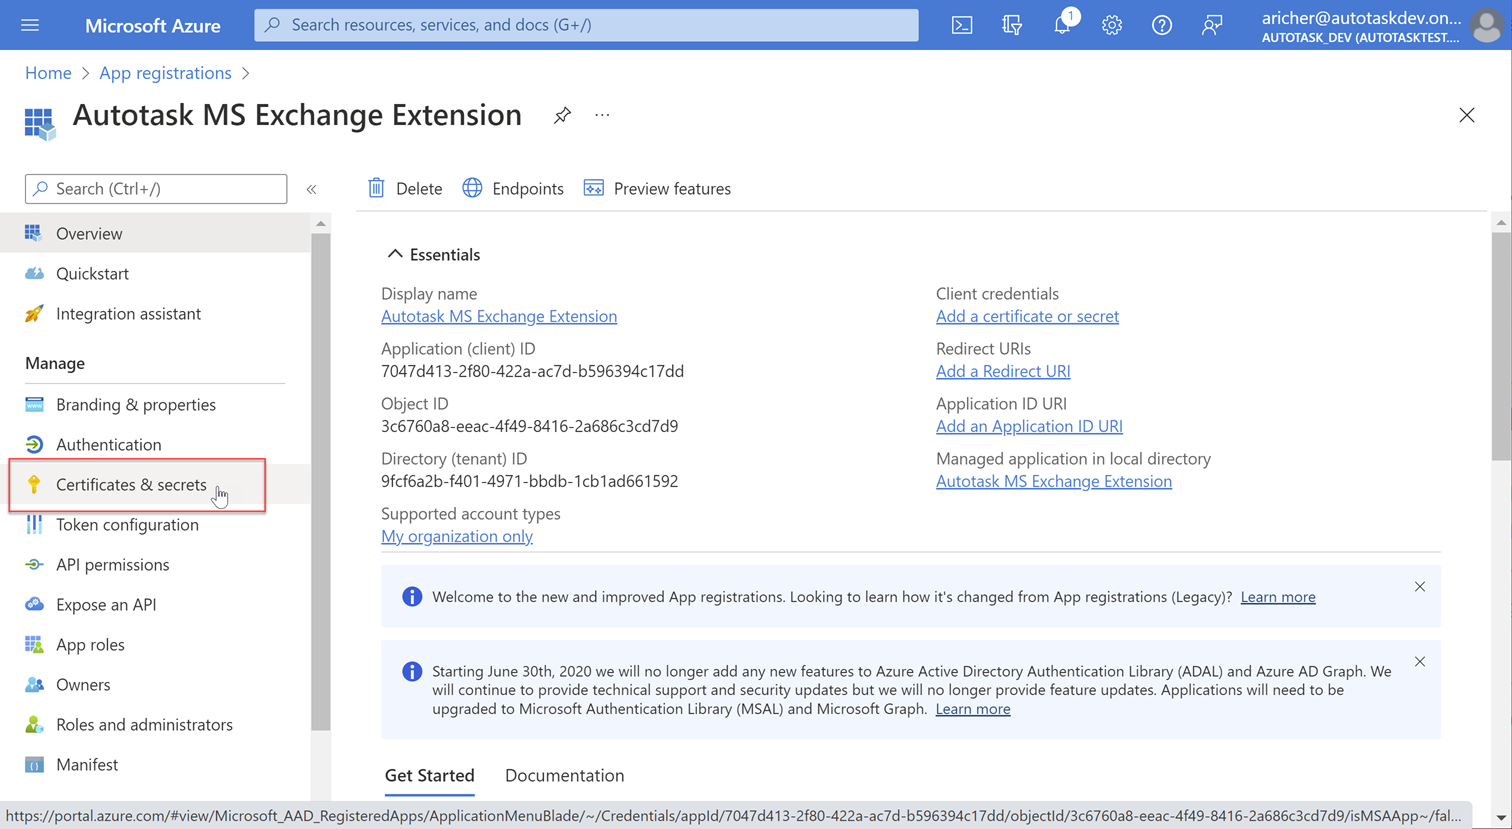
- In the app menu Manage section, click Certificates & secrets.
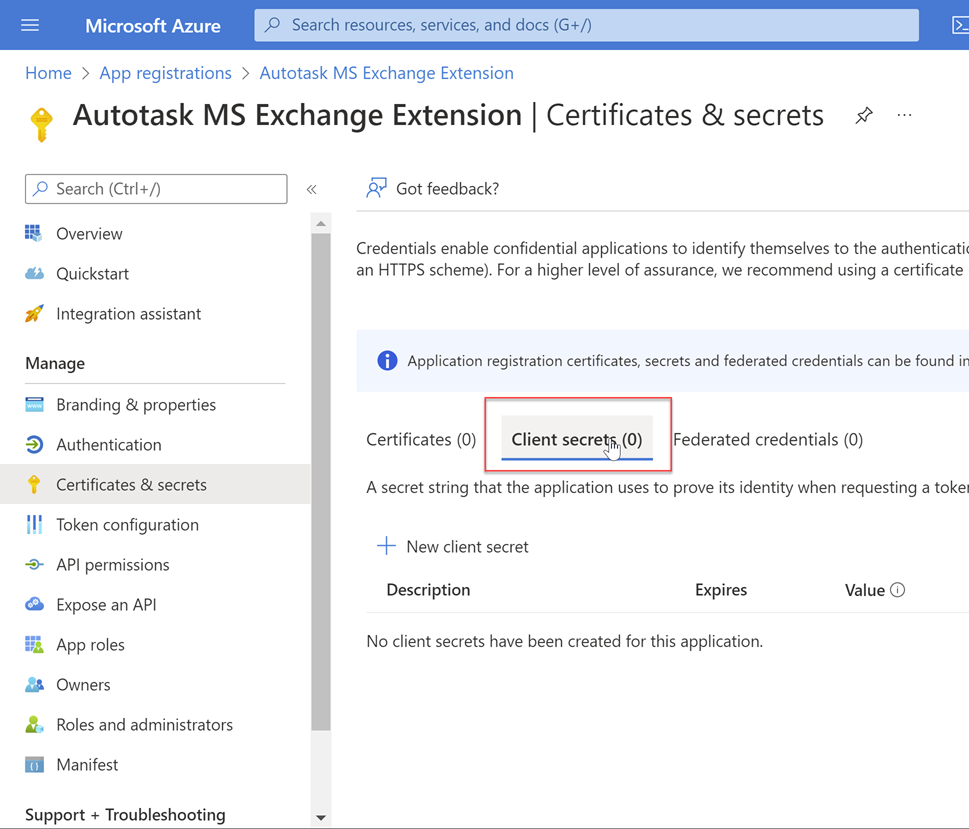
- Click the Client secrets tab.
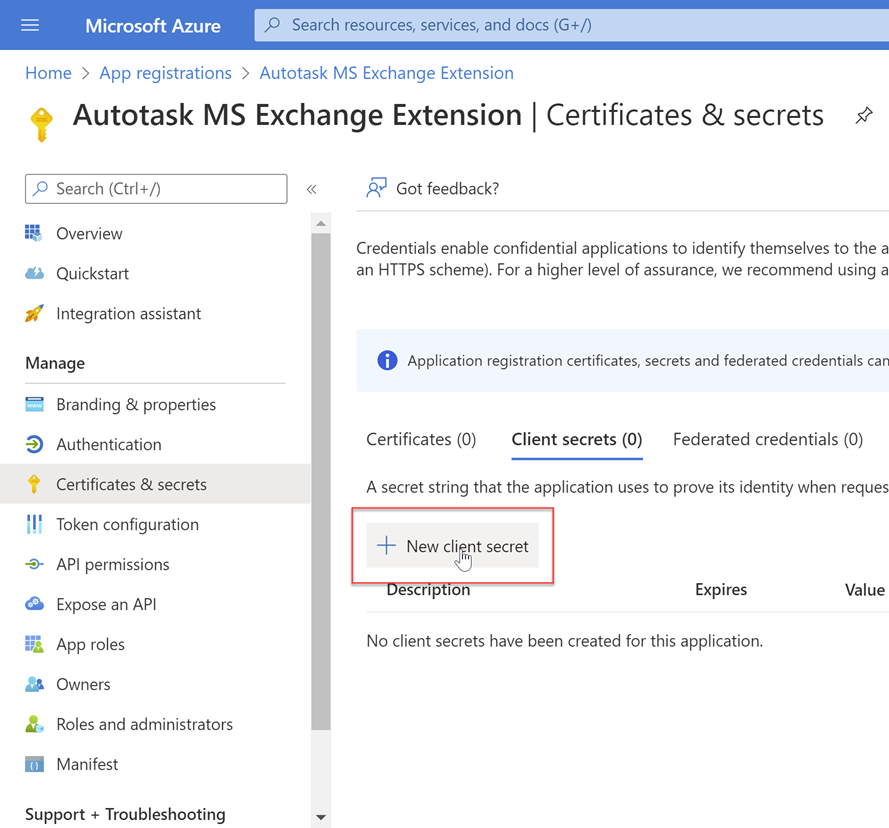
- Click New client secret. The Add a client secret side panel will open.
- Enter a Description.
- In the Expires field, select the time frame this secret will be valid for. Whatever duration you select, put a reminder in your calendar to generate a new secret and put it into the Autotask MS Exchange Configuration page before this one expires.
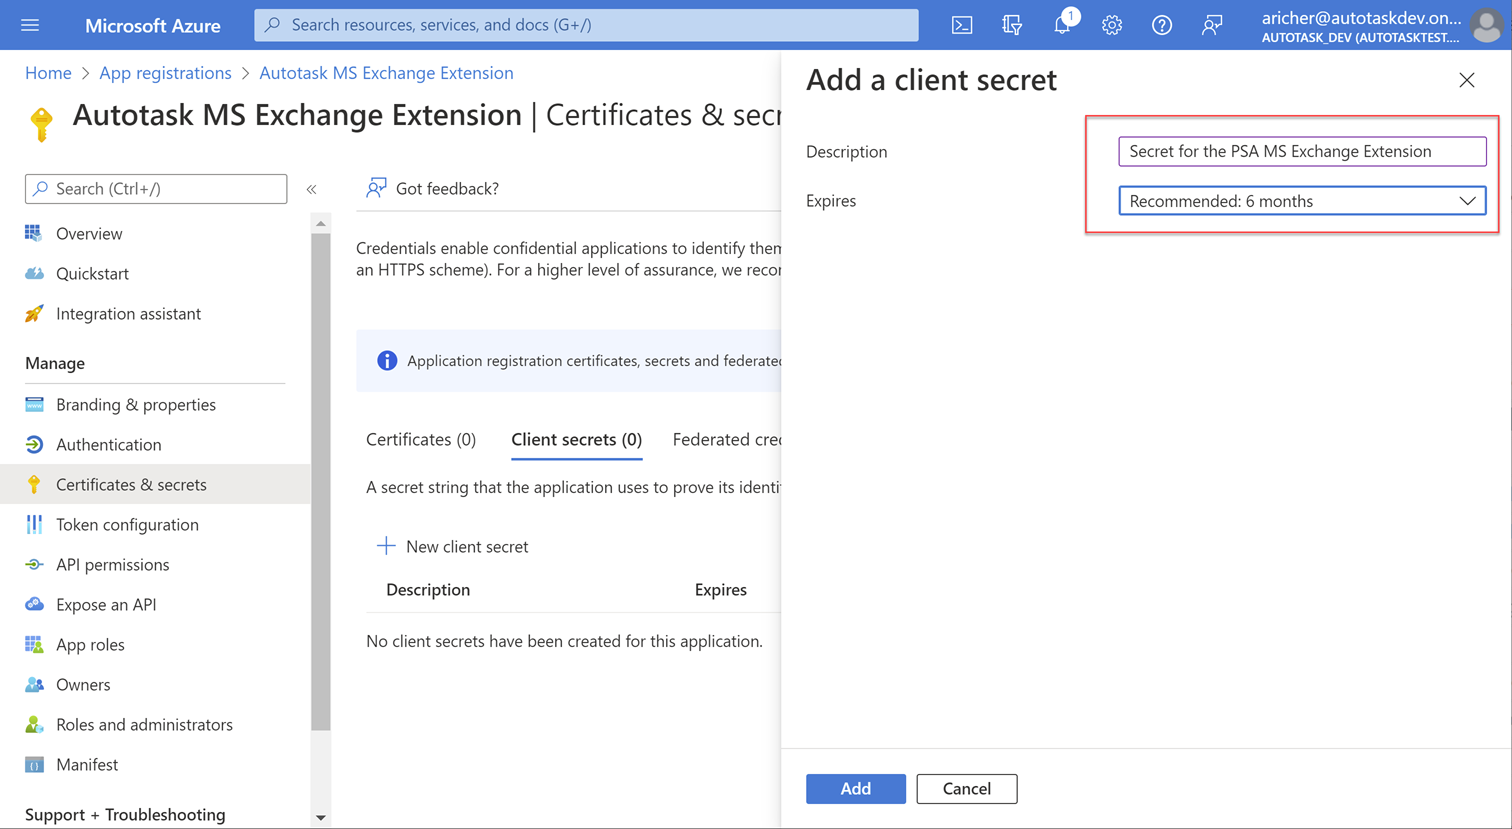
- Click Add. A dialog will let you know that your client secret was added successfully, and the client secret is now listed on the Client secrets tab.
- Copy the client secret Value into a note for pasting them into the Autotask MS Exchange Extension Configuration page. Refer to Pasting the synchronization credentials into Autotask.
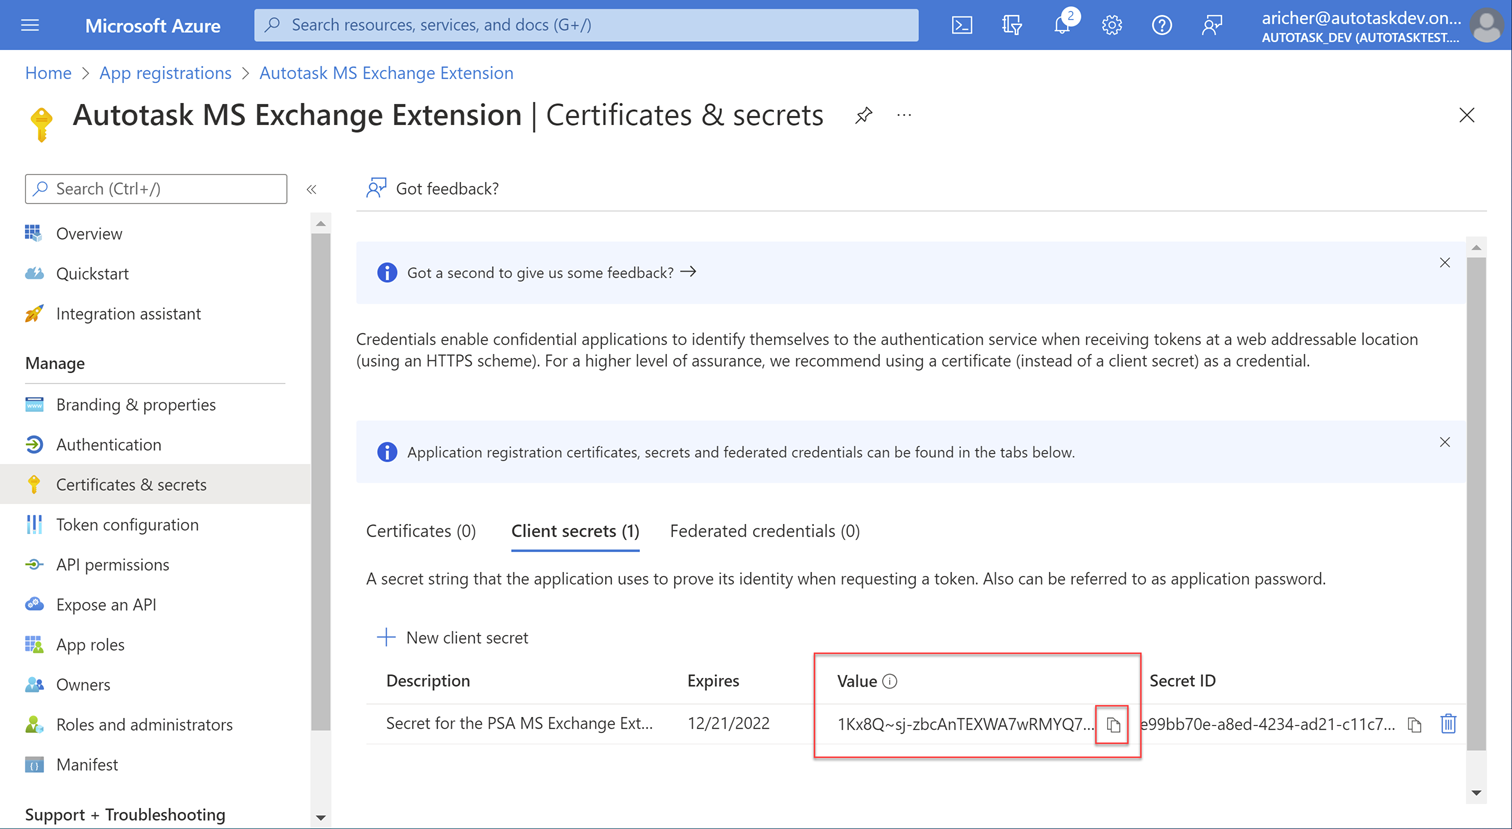
IMPORTANT Once saved, the secret is masked. If you forget to save the secret value, you must generate a new secret!
You can use either Exchange Web Services (EWS) or MS Graph to access the integration. Select the appropriate option below and complete the steps.
- In the app menu, click Manage > API permissions. The Your App Name - API permissions page will open.
- Click Add a permission.
- Go to APIs my Organization uses tab and choose Office 365 Exchange Online.
- Click Application permissions and select full_access_as_app. This allows the app to have full access via Exchange Web Services to all mailboxes without a signed-in user.
- Click Add permission. The permission is added, but appears as Not granted.
- Scroll to the Grant consent section and click Grant admin consent for [your company name]. If the permission still appears as Not granted, log out and back in to refresh the setting.
Once the app is registered, you will need to add a callback URL and define the level of access. Complete the following steps:
- Go to the App registrations page and open the application you created for the integration with the Autotask MS Exchange integration.
- In the sidebar menu, select Authentication.
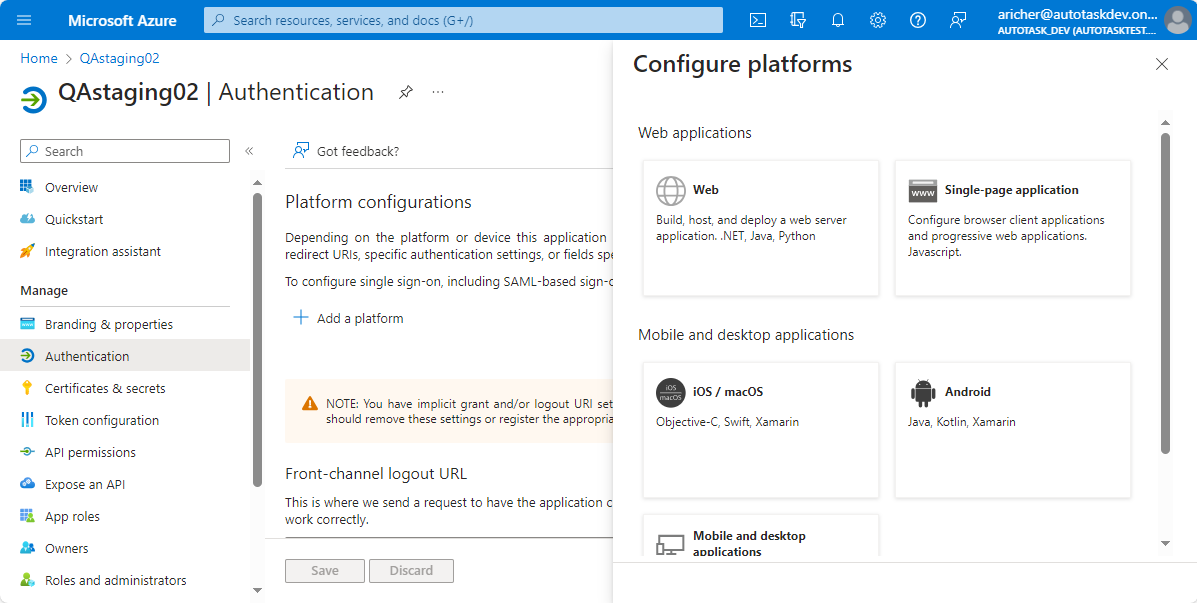
- Under Platform configurations, click Add a platform. The Configure platforms dialog window will open.
- Click the Web tile.
- Enter the call back in this format: https://[zone].autotask.net/autotask/SingleSignOn/ExchangeCallback.aspx where [zone] is your Autotask zone (i.e., ww3, ww4, ww15, etc.).
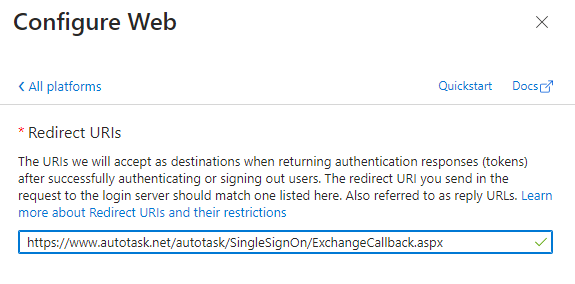
- Click Configure. The callback URL is added to the list of Redirect URIs.
- Next, go to Manage > API Permissions
- Click Add a permission.
- Select the Microsoft Graph tile.
- Click Delegated permissions and add the respective permissions by selecting the check boxes.
- Click Application permissions and add the remaining ones.
- At the bottom of the pane, click Add permissions. The pane will be closed, and the permissions you added appear under Configured permissions.
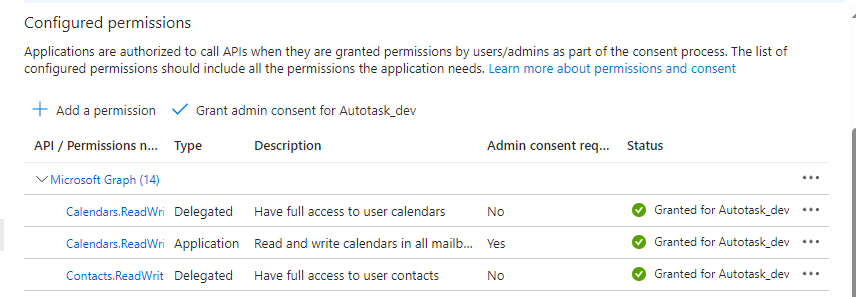
- Click Grant admin consent for [name of your app].
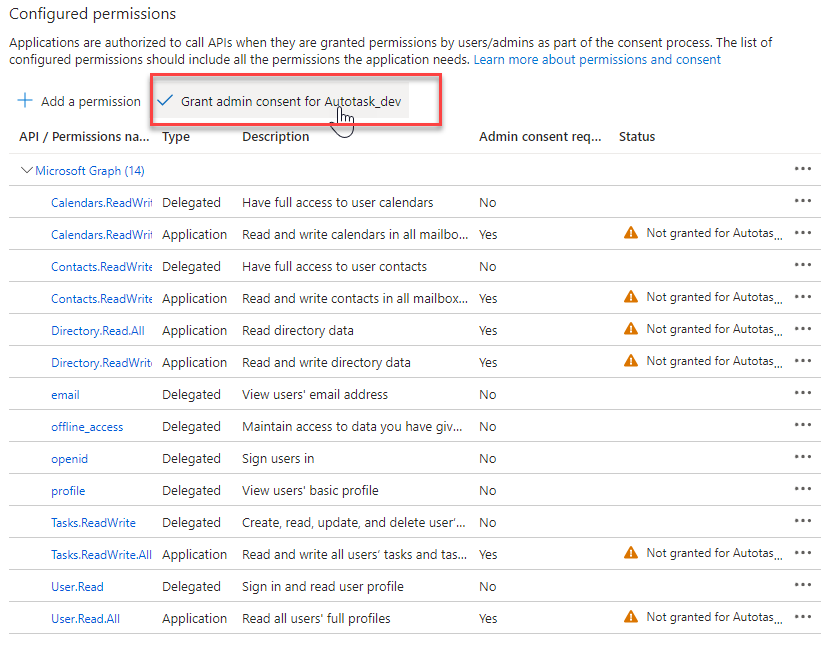
- The status will change to Granted...
The permissions are as follows:
| Microsoft Graph permissions | Description |
|---|---|
|
Delegated permissions (Admin consent not required) |
|
| OpenId permission.email | Allows the app to read your users' primary email address. |
| OpenId permission.offline_access | Allows the app to see and update the data you gave it access to, even when users are not currently using the app. This does not give the app any additional permissions. |
| OpenId permission.openid | Allows users to sign in to the app with their work or school accounts and allows the app to see basic user profile information. |
| OpenId permission.profile | Allows the app to see your users' basic profile (e.g., name, picture, user name, email address). |
| Calendars.ReadWrite | Allows the app to create, read, update, and delete events in user calendars. |
| Contacts.ReadWrite | Allows the app to create, read, update, and delete user contacts. |
| Tasks.ReadWrite | Allows the app to create, read, update, and delete the signed-in user's tasks and task lists, including any shared with the user. |
| User.Read | Allows users to sign-in to the app, and allows the app to read the profile of signed-in users. It also allows the app to read basic company information of signed-in users. |
|
Application permissions (Admin consent required) |
|
| Calendars.ReadWrite | Allows the app to create, read, update, and delete events of all calendars without a signed-in user. |
| Contacts.ReadWrite | Allows the app to create, read, update, and delete all contacts in all mailboxes without a signed-in user. |
|
Directory.Read.All |
Allows the app to read data in your organization's directory, such as users, groups and apps, without a signed-in user. |
|
Directory.ReadWrite.All |
Allows the app to read and write data in your organization's directory, such as users, and groups, without a signed-in user. Does not allow user or group deletion. |
| Tasks.ReadWrite.All | Allows the app to create, read, update and delete all users’ tasks and task lists in your organization, without a signed-in user |
| User.Read.All | Allows the app to read user profiles without a signed in user. |
In Autotask
After you have completed the app registration process, you will need to paste the values you have been saving in a note into the MS Exchange Extension Configuration page. The following fields are required:
- Application (client) ID
- Directory (tenant) ID
- Client secret
- User email address
This information is entered into the Synchronization Credentials section on the General tab of the MS Exchange Extension Configuration page. Refer to How to set up the MS Exchange Extension.
To test the new integration in Autotask, you will need to enter the email address of an active Azure AD or Entra ID user with a mailbox. This user will receive a confirmation email that the integration configuration was successful.
- Navigate to Azure Active Directory > Users or Microsoft Entra admin center > Identity > Users and copy the email address of a Member user.
- Paste this email address into the Email (for testing purposes) field on the MS Exchange Extension Configuration page.
- Save the MS Exchange configuration page. This user will receive a confirmation message if the configuration settings work, or an error message if they fail. Items that cannot be validated will show a warning icon.
