Enabling the Kaseya Web Services API
NOTE This information is provided as a service to Autotask users who are implementing the Kaseya Extension. Kaseya problems and questions should be directed to Kaseya Customer Support at support@kaseya.com.
You enable the Kaseya Web Services by selecting the Enable VSA API Web Service check box via the System tab on the Kaseya server.
For Kaseya 5.x and Managed Service Edition - G1:
- Select the Kaseya System tab.
- On the left side of the System tab, under Server Management, click the Configure link.
- Locate the Enable VSA API Web Service check box. If it is clear, click to select.
- Continue the implementation of the Autotask Kaseya Extension.
For Kaseya 2 (v. 6 and 7):
- In the left navigation menu, click the white Down arrow, then select System.
- Under Server Management, click Configure.
- Locate the Enable VSA API Web Service check box. If it is clear, click to select.
- Continue the implementation of the Autotask Kaseya Extension.
For hosted Kaseya
Contact Kaseya to enable the Kaseya API for Hosted Managed Workplace.
To access the Kaseya monitoring service, you must configure a Kaseya security level that provides the required access rights. Following are step by step instructions to set up a dedicated Kaseya Role and user account with the minimum required access rights for the integration to function.
IMPORTANT While a user account with full access rights would certainly do the job, for security reasons, we strongly advise against this.
- Open the Kaseya application and navigate to the System > User Security > User Roles page.
- Click New.
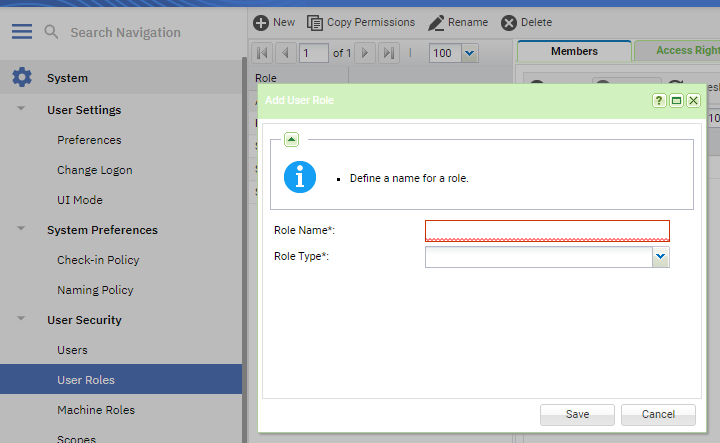
- Enter a Role Name.
- In the Role Type field, select VSA Admin.
- Click Save.
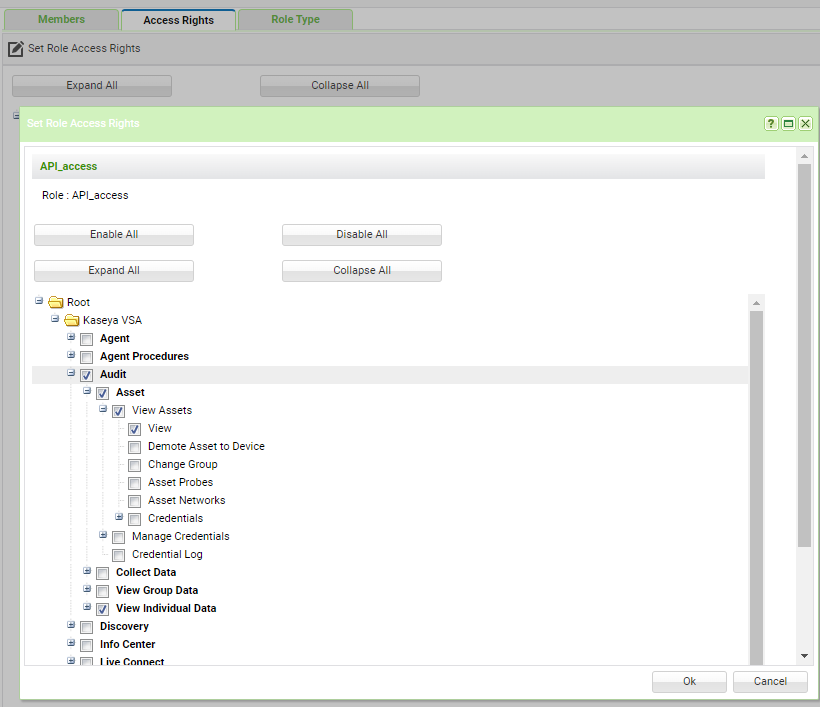
- Select the new role on the list of roles and click the Access Rights tab.
- Click Set Role Access Rights.
- On the page that opens, click Disable All.
- Click Collapse All.
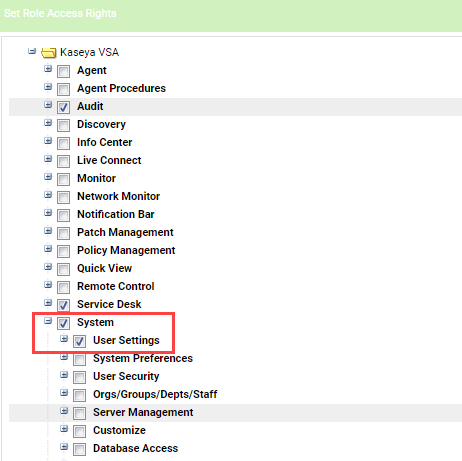
- Open Root > Kaseya VSA > Audit > Device > View Devices and check View.
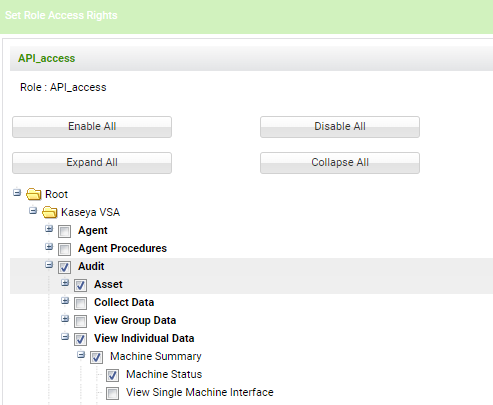
- Open Root > Kaseys VSA > Audit > Individual Data > Machine Summary and click Machine Status.
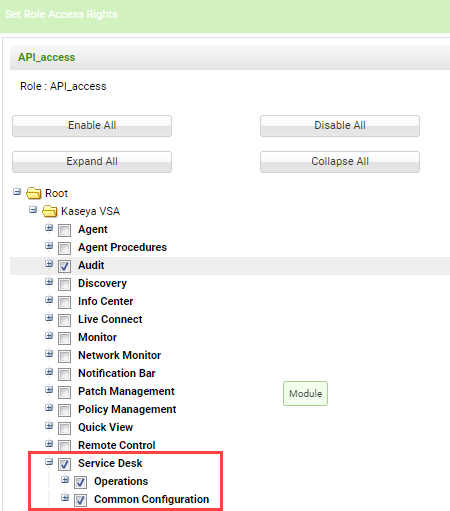
- Scroll to Root > Kaseya VSA and check Service Desk.
- Scroll to Root > Kaseya VSA > System and check User Settings.
- At the bottom of the page, click OK.
The role is now configured. The next step is to assign this role to the user account that you will use for the integration. If you are a current user of the integration, assign the new role to the existing user account.
Kaseya is now using access tokens instead of passwords, so the next step is to create an access token.
- Navigate to User Security > Users and select the user account you created for the integration.
- Click the Access Token tab.
- Enter a Token Name.
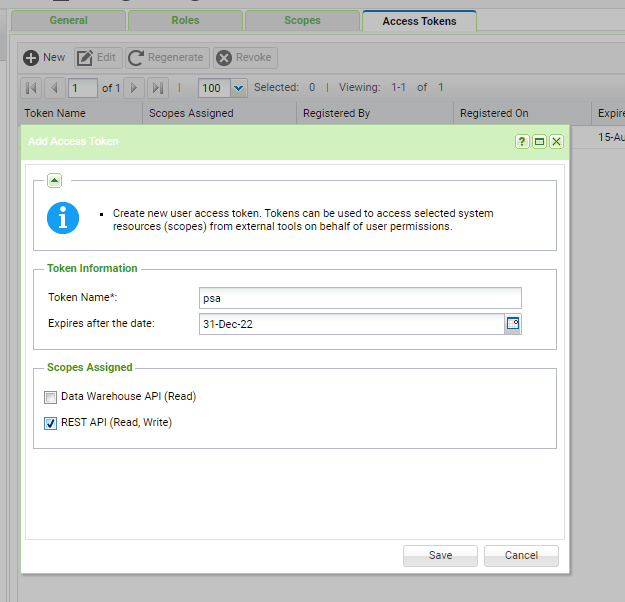
- Enter a date when this token will expire.
- Under Scopes Assigned, select REST API.
- Click Save. The token is created and displayed this one time. Once you click OK, you cannot return to the dialog window.
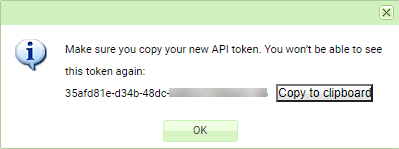
- Click Copy to Clipboard, then click OK.
- In Autotask, open the Admin > Extensions & Integrations > Remote Monitoring / Management Extensions > Kaseya page.
- In the Adapter Web Services section, paste the contents of the clipboard into the Token field.
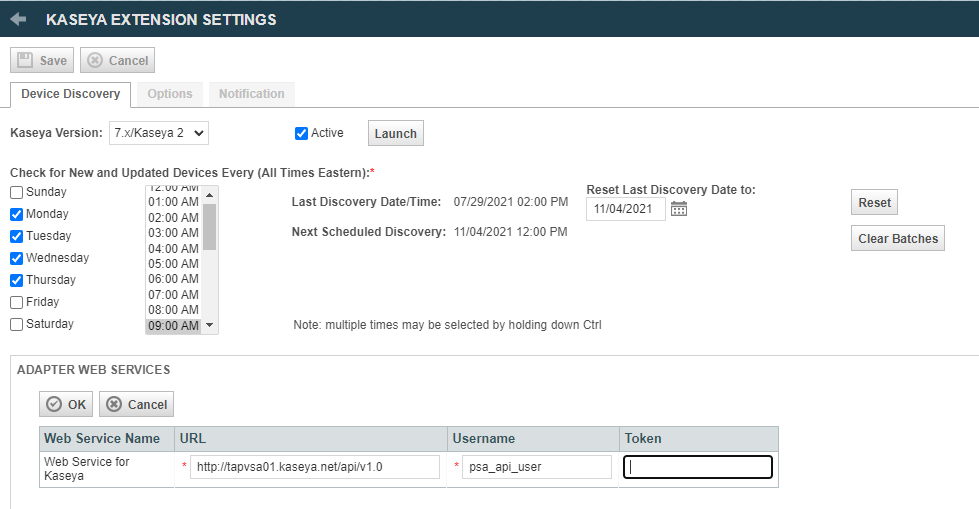
- Click Save.
After you save the Kaseya Extension Settings, we recommend that you launch device discovery. If the URL, Username, or Token are not entered correctly, the launch will fail with a message that will help diagnose the issue.
To have the ticket number match with the "ticketreferencing" number in the URL:
In the left pane, go to Ticketing > Email Reader and check the Turn off independent ticket sequence numbering (use identity value) box.
This check box is not available on multi-tenant systems.
Next step
The next step is Setting up Kaseya Device Discovery in Autotask.


