Setting up the MS Exchange synchronization account
This step is the prerequisite for configuring the Exchange extension on-premises, using Basic Authentication.
The MS Exchange synchronization account is used to test the connection between the Autotask MS Exchange Extension and your MS Exchange Server. The Synchronization Account User must have authentication rights to make calls to Exchange Web Services.
IMPORTANT While you can use an existing administrator account for this purpose, Autotask strongly recommends that you set up a special account (called a Synchronization Account) to avoid exposing your administrator account credentials and posing a possible security risk.
To set up the account, you must complete the following tasks:
- Create the Synchronization Account
- Create an MS Exchange Mailbox for the Account
- Give "Impersonate" rights to the Synchronization Account
- Give the Synchronization Account Public Folder Access. Public folder access is only required if you will be creating a public folder of all Autotask contacts on your MS Exchange Server
NOTE Currently, Autotask does not support the use of Extended ASCII characters in authentication credentials. Keep this in mind when setting up your synchronization account and user profiles.
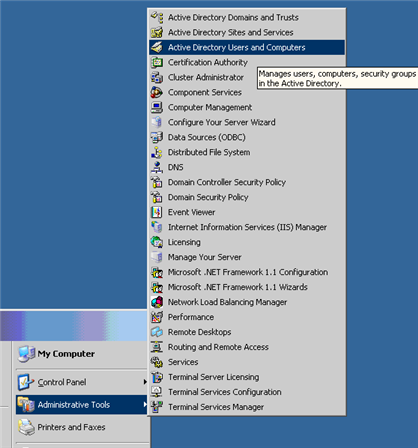
- Log into your domain controller and open Active Directory Users and Computers:
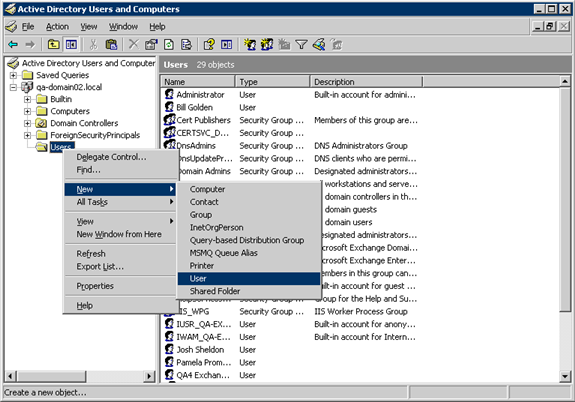
- On the Active Directory Users and Computer menu, right-click Users and select New > User:
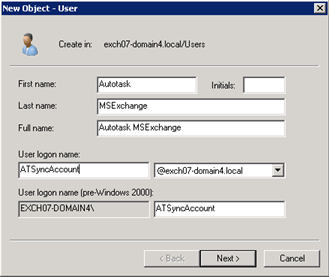
The New Object - User page opens:
- Enter the following information:
- First name: Autotask
- Last name: MSExchange
- Full name: Autotask MS Exchange
- User logon name: ATSyncAccount@ [select your own domain]
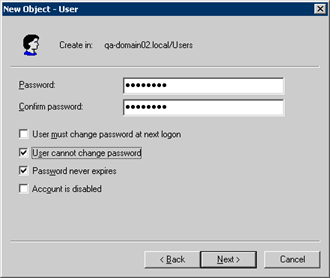
- Click Next. The password page opens:
- Assign a password and select:
- User cannot change password
- Password never expires
- Click Next.
- Click Finish to create the user.
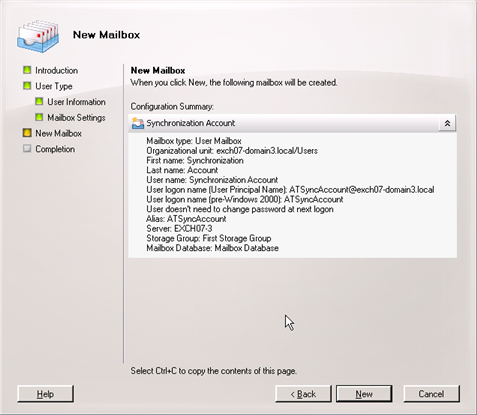
- Next, give the account an MS Exchange mailbox.
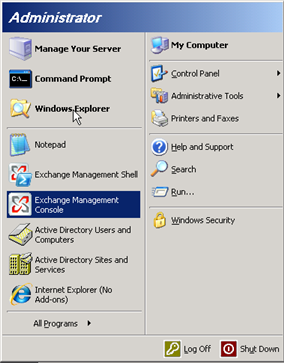
- Open the Exchange Management Console:
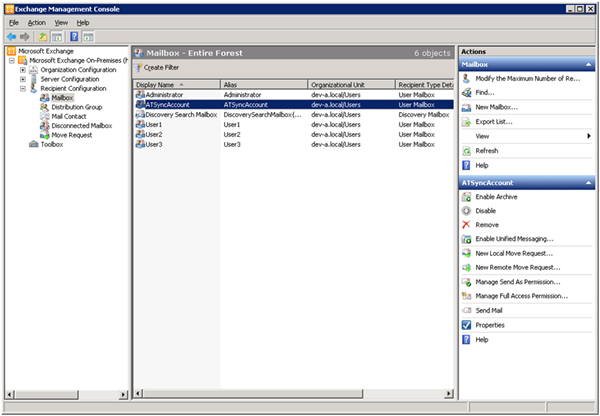
- Expand the Recipient Configuration tree and click Mailbox to display the MS Exchange users:
MS Exchange 2010/2013
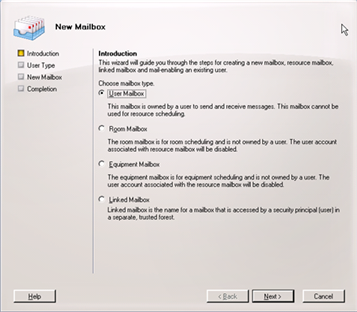
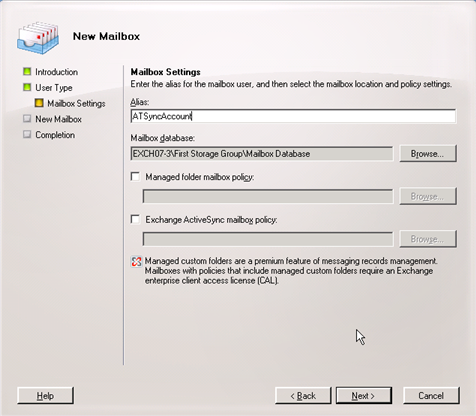
- In the right navigation pane, click New Mailbox. The New Mailbox Wizard opens:
- Click Next.
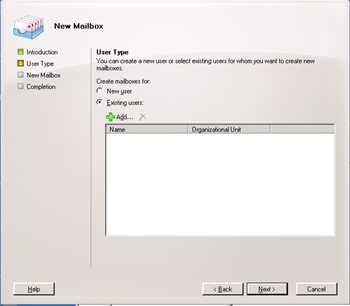
- Select to Create mailboxes for Existing users and click the Add icon to select the Sync Account user. The Select User window opens.
- Select the Synchronization Account user and click OK.
- Click Next.
- Click New to create the mailbox(es).
- Click Finish.
MS Exchange 2010 and 2013 use Role-Based Access Control (RBAC) to assign permissions to accounts.
NOTE You cannot administer RBAC from the UI, so you must use the Exchange Management Shell.
Granting the Impersonation Rights for MS Exchange 2010 and 2013 using the Exchange Management Shell
MS Exchange 2010 and 2013 require only one type of impersonation right.
- Log into your domain controller and open the Exchange Management Shell (Start > Exchange Management Shell).
- Enter the following New-ManagementRoleAssignment cmdlet:
New-ManagementRoleAssignment –Name:impersonationAssignmentName –Role:ApplicationImpersonation –User:serviceAccount
where "serviceAccount" is the "impersonating identity".
- Run the cmdlet.
- Next, if you will be creating a public folder of all Autotask Contacts on your MS Exchange Server, give the synchronization account access to public folders.
For additional information on the New-ManagementRoleAssignment cmdlet, refer to the following MSDN article: http://msdn.microsoft.com/en-us/library/bb204095(v=exchg.140).aspx.
Take the following steps if you will be creating a public folder of all Autotask contacts on your MS Exchange Server:
- Log in to your domain controller and open Active Directory Users and Computers:
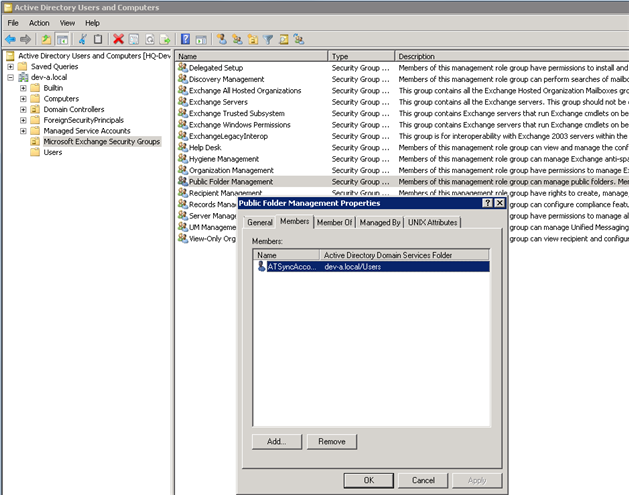
- On the Active Directory Users and Computer menu, select Microsoft Exchange Security Groups.
- Right-click Public Folder Management and select Properties or, alternately, click Public Folder Management and select Properties from the Actions menu.
- Select the Members tab and add your Autotask Synch Account. Click OK.
NOTE You can also perform this action by running a cmdlet in the Exchange Management Shell (Start > Exchange Management Shell). Use the following code:
-Identity "Public Folder Management"
-Member ATSycnAccount
NOTE Troubleshooting Note: In some instances, you may need to give the Synchronization Account access to individual mailboxes even if you will not be using this account for synchronization. If you encounter problems with MS Exchange, give the Synchronization Account mailbox access and retest the synchronization.
