Configuring AD for an organization in Azure
This topic lists the steps that are required to set up AD sync in Active Directory. You must complete this process for each Autotask organization for which you want to set up Active Directory Sync. Once set up in Azure, proceed with the configuration in Autotask. Refer to Setting up Active Directory sync for an organization in Autotask.
Requirements
- An Azure administrator account
- An Azure Active Directory service
- Application ID, API Key, and Authentication domain from WAAD
Configuration process
NOTE We recommend that you open a note to paste the required IDs and the Client Secret into.
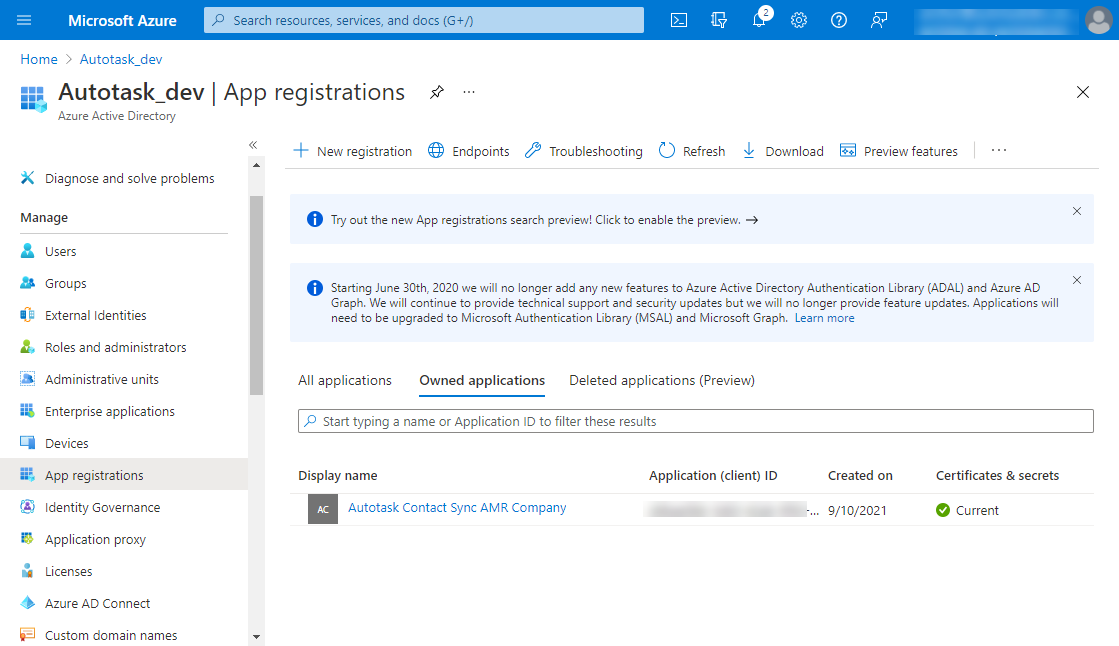
- Click New registration. The Register an application page opens.
- Enter a Name that makes it clear what the app will be used for (such as the name of the organization you want to sync).
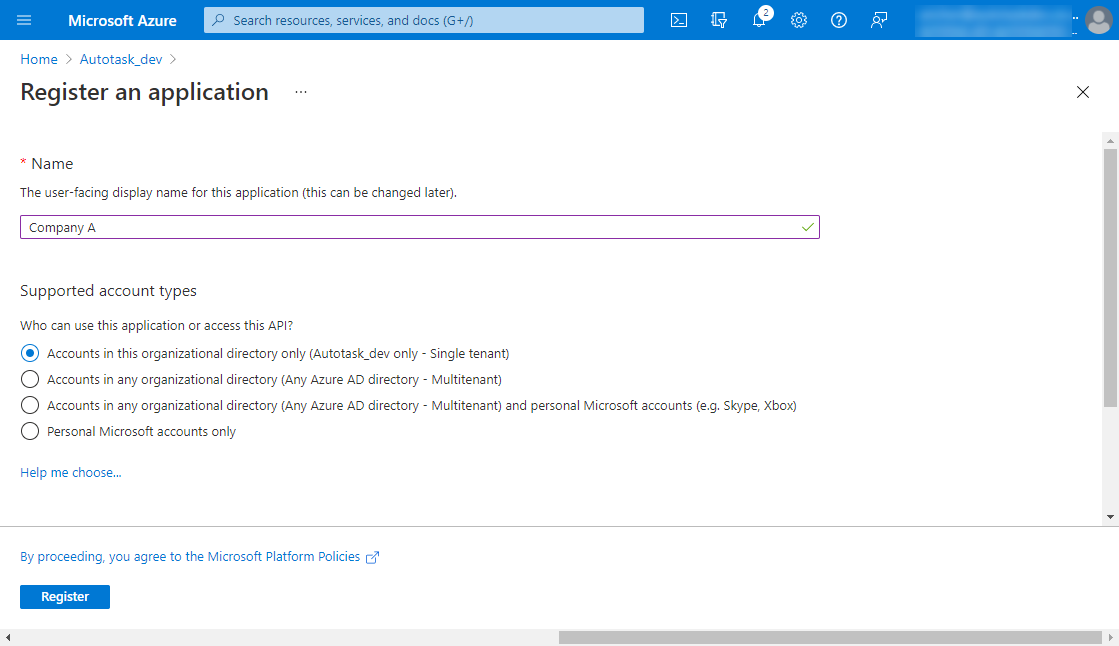
- Under Supported account types, click the Accounts in this organizational directory only (your local organization name) only - Single tenant) radio button.
- Click Register. A dialog will pop up to let you know that you successfully created the app, and the page for the new app will open.
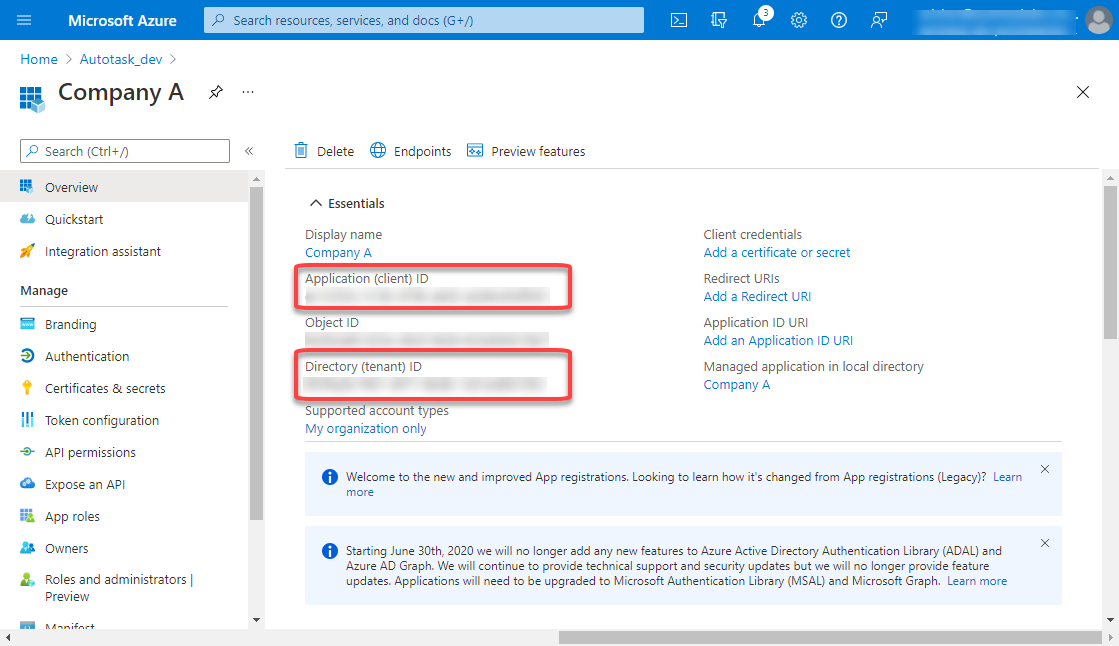
Right below the Display name, you will see the Application (client) ID and Directory (tenant) ID that you will need to copy into the Autotask MS Exchange Extension configuration page.
NOTE Copy the IDs into a note for pasting them into the Autotask Active Directory (AD) Sync configuration page.
A client secret is a secret string that the application uses to prove its identity when requesting a token. It is sometimes referred to as the application password.
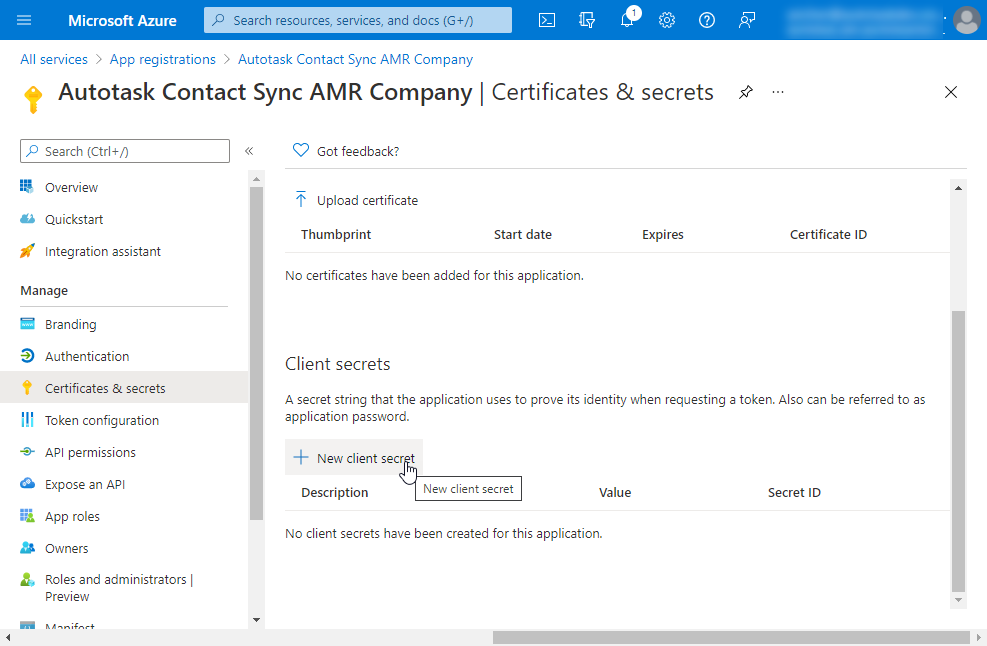
- Click the Add a certificate or secret link or, in the app menu, click Manage > Certificates & secrets.
- In the Client secrets section, click New client secret.
- Enter a description, and select an expiration date.
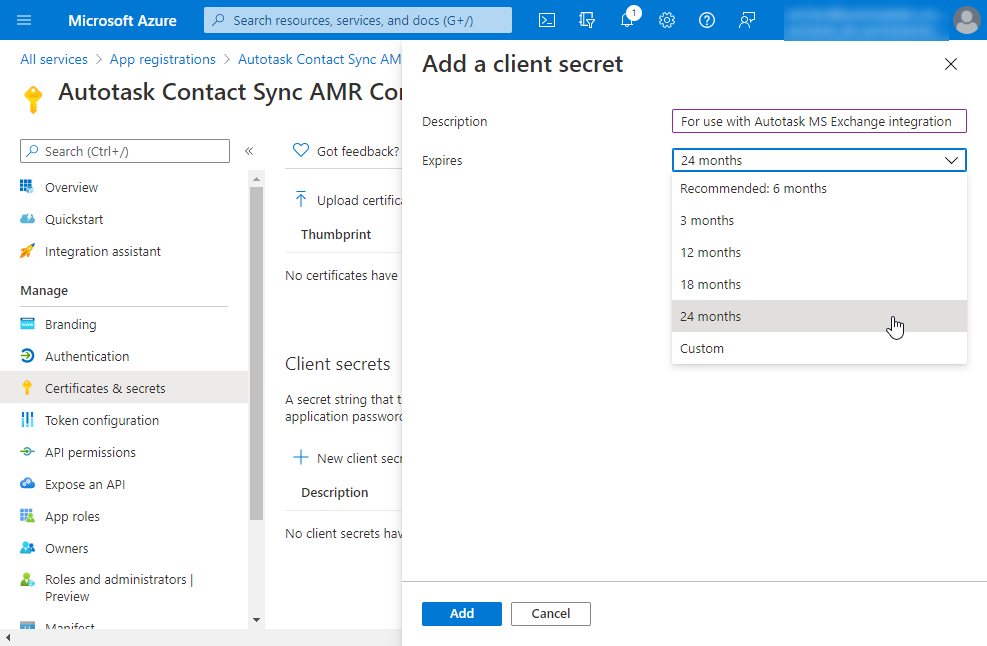
NOTE We recommend that you select the latest possible expiration date. When a secret expires, a new secret will need to be generated and put into the Autotask configuration page.
- Click Add. A dialog will let you know that your client secret was added successfully, and the Value and the Secret ID are now listed in the Client secrets section.
- Copy the client secret Value into your note for pasting it into the Autotask Active Directory (AD) Sync configuration page.
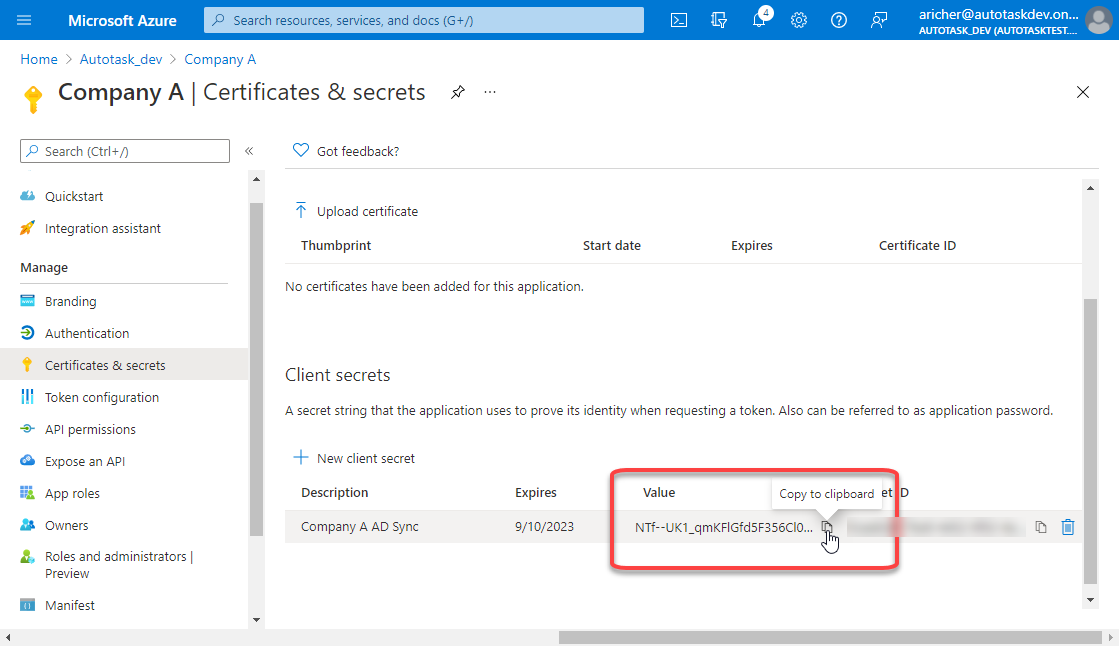
IMPORTANT Once you navigate away from this page, the secret may be masked.
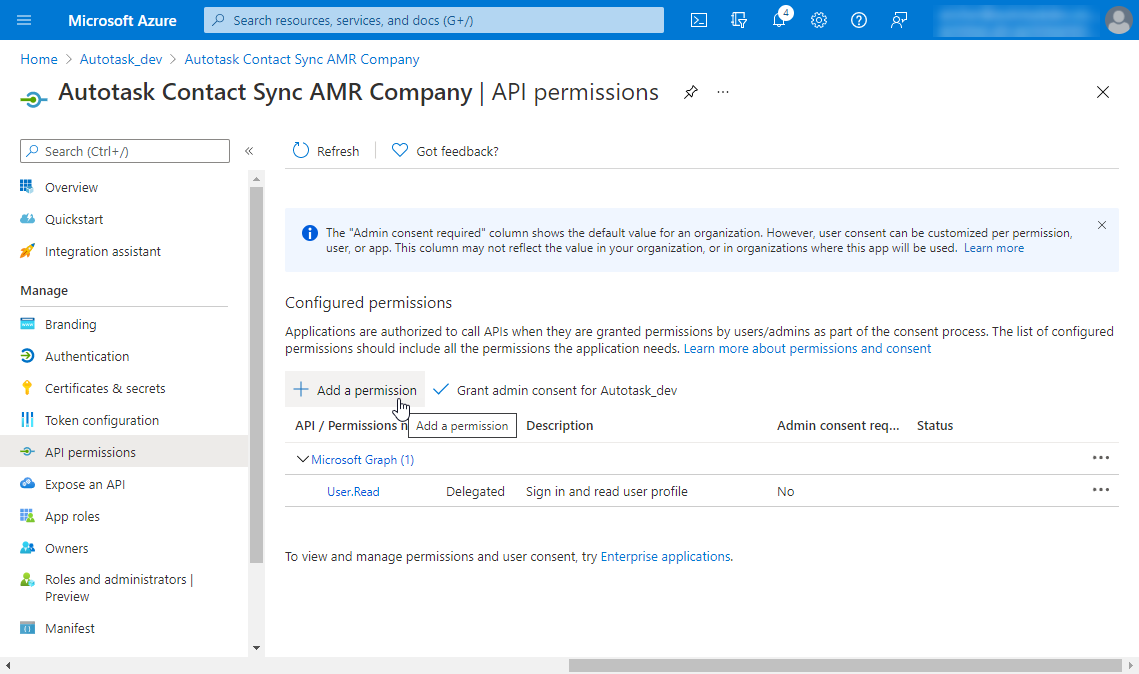
- In the app menu, click Manage > API permissions. The Your App Name - API permissions page will open.
- Click Add a permission.
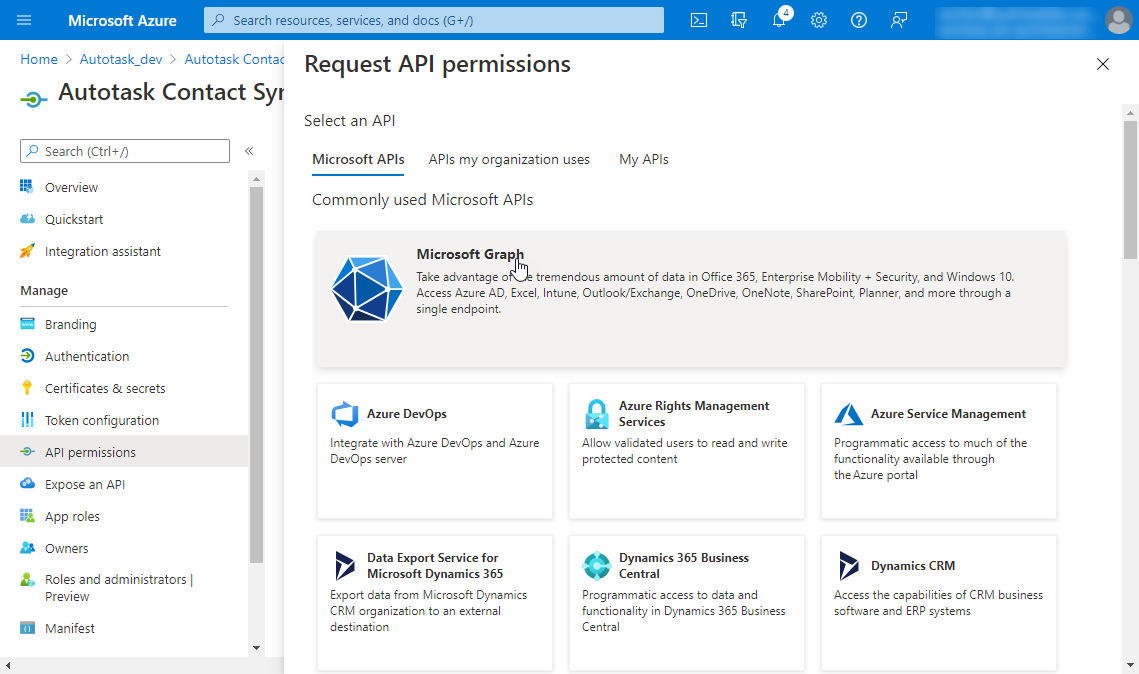
- On the Request API permissions page, click Microsoft Graph.
- Add the following permissions from the Delegated permissions and Application permissions lists:
| Microsoft Graph permissions | Type | Description | Admin consent required |
|---|---|---|---|
|
Directory.Read.All |
Application |
Allows the app to read data in your organization's directory, such as users, groups and apps, without a signed-in user. |
Yes |
|
Directory.ReadWrite.All |
Application |
Allows the app to read and write data in your organization's directory, such as users, and groups, without a signed-in user. Does not allow user or group deletion. |
Yes |
| User.Read | Delegated | Sign in and read user profile | No |
- The Application permissions are added, but are initially Not granted. Click Grant admin consent for [your local organization name].

- The page is refreshed, and the Status is updated to Granted for [your local organization name].
If the permission still appears as Not granted, log out and back in to refresh the setting.
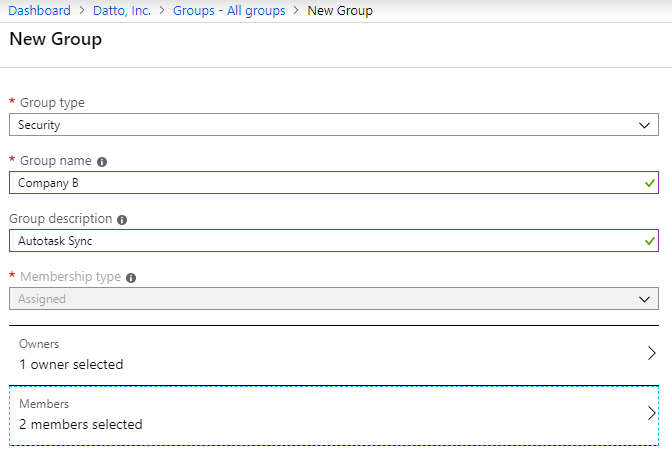
To sync users to Autotask, a Group ID is required. Only users assigned to this group will be synced to Autotask.
-
From the Microsoft Entra admin center, select Entra ID.
-
Click Groups.
-
Click New group.
-
Complete the remaining fields and add members or existing groups to the group.
-
Click Create. The new group is added to the All groups list.
-
Click the group name to open the group and copy the Object ID.

-
Paste the Object ID into your note.
You are now ready to configure Active Directory Sync for this organization in Autotask. For the next step, refer to Setting up Active Directory sync for an organization in Autotask.
