Configuring Autotask SSO with Okta
PERMISSIONS Security level with Admin permission to configure Resources/Users (HR) and system administrator role for the Identity Provider
NAVIGATION Left Navigation Menu > Admin > Admin Categories > Organization Settings & Users > Resources/Users (HR) > Security > Single Sign-On (OpenID Connect (OIDC))
NOTE This topic provides vendor-specific instructions. For general instructions, refer to Configuring Single Sign-On (OpenID Connect).
Creating the app
To set up Autotask with Okta as the identity provider, do the following:
- In Autotask, open the Single Sign On (OpenID Connect) page.
- Log into Okta as a system administrator.
- Go to Okta Admin Console > Applications > Applications.

- Click Add Application > Create New App. Make the following selections:
- Platform: Web
- Sign on Method: OpenID Connect
- Click Create.
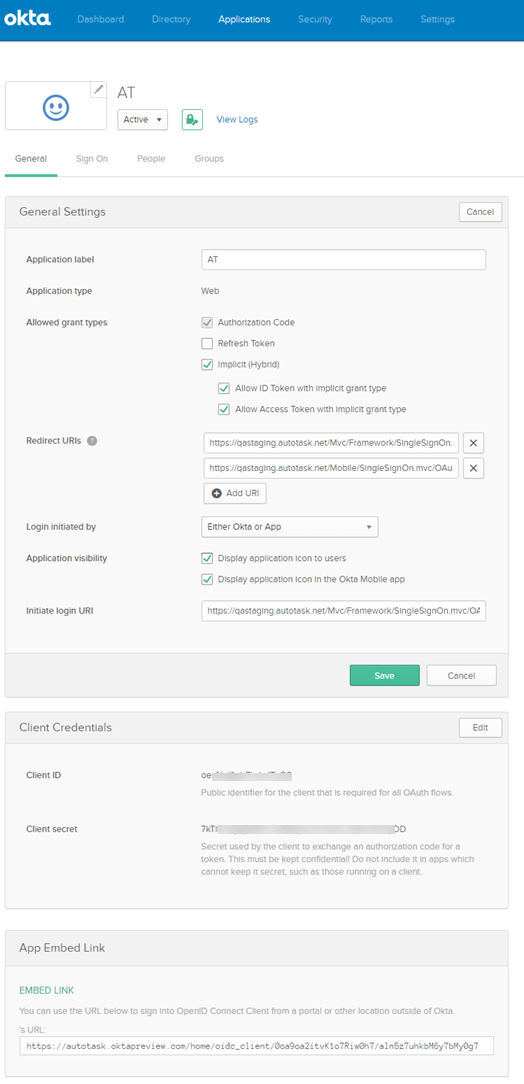
- Enter a name for the application, such as Autotask, into the Application Label field.
- In Autotask, copy the Callback/Redirect URLs and paste it into the Login Redirect URI fields in Okta.
- Click Save. Client ID and Client secret are now created.
- On the General tab, click Edit.
- Under Allowed grant types, select Implicit (Hybrid) and Allow ID Token with implicit grant type.
- Change the Login initiated by from App Only to Either Okta or App.
- Under Application Visibility, select Display application icon to users.
- For login flow, ensure Redirect to app to Initiate login (OIDC Compliant) is selected
- In Autotask, copy the Initiate Login URL and paste the value into the Initiate login URL field in Okta.
- Click Save.
- Copy the Client ID and Client Secret fields in Okta and paste them into the same fields on the Single Sign On (OpenID Connect) page in Autotask.
- In Autotask, click Test.
- Click Save. Note that unless the test is successful, you won't be able to save the page.
Assignment and resource mapping
If you selected Enabled for selected resources using Identity Provider's Name Identifier (see Resources tab), additionally do the following:
- In the Okta Admin console, navigate to Settings > Features.
- Click Enable Reports - User Accounts.
- Navigate to Reports > Reports. In the Entitlements and Access section, click User accounts.
- Click CSV Export to download the file.
- In Autotask, open the Single Sign On (OpenID Connect) page and click on the Resources tab.
- Copy the Okta User ID for each user you want to enable SSO for.
- Select the check box next to each user you want to enable SSO for, and enter the Okta User ID into the Unique ID field.

- Click Save.


