Managing internal resources and co-managing users
PERMISSIONS Security level with Admin permission to configure Resources/Users (HR). Refer to Admin security settings.
NAVIGATION Left Navigation Menu > Admin > Admin Categories > Organization Settings & Users > Resources/Users (HR) > Resources/Users (HR) > Resources/Users
NAVIGATION Left Navigation Menu > Admin > Admin Categories > Features & Settings > Co-managed Help Desk > Co-managing Users
NAVIGATION Left Navigation Menu > Admin > Admin Categories > Features & Settings > Co-managed Help Desk > Unmapped Co-managing Users
About the pages where you manage resources and users
There are three pages where you can manage the access of internal resources and co-managing users to your Autotask instance. The pages are have similar features, but show different groups of users. Refer to The Co-managed Help Desk.
- On the Resources page, you access internal resources and API users.
- On the Co-managing Users page, only co-managing users with a license type of Co-managed Help Desk appear.
- On the Unmapped Co-managing Users page, only co-managing users with a license type of Co-managed Help Desk who are not yet mapped to an organization contact are displayed.
NOTE Mapping a co-managing user to an organization contact is a requirement in Autotask. Refer to Convert to Co-managing User (only available on the Co-managing Users page, as long as the co-managing user has not yet been associated with an organization contact).
General information
A resource is a user with an Autotask log in. There are two types of resources:
- Resources: Regular resources who will be logging into your Autotask instance. Any employee, consultant, or contractor with your company who will be assigned project tasks, tickets, or sales to-dos, or who is involved in reporting on, approving and posting, or managing these activities must be set up as a regular Autotask resource.
- API Users: An API user is a special type of user account that is required to work with Autotask APIs. API user accounts will not provide access to the Autotask UI, but they are free of charge.
It is a best practice is to set up a separate API user account, and maybe even a separate API User (system) (API-only) or API User (system) Can't Read Costs (API-only) security level, for each integration with which your developers are working. Doing so enables you to tailor the security permissions to the areas required by each integration.
For partner integrations that appear on the Integration Center page, you can add API users right from the page. Refer to Integration Center.
Co-managing users are customer contacts who are given modified access to an MSP partner's Autotask instance. They use security levels specifically configured for this purpose, and only have access to customer accounts they are explicitly assigned to. Within configured limitations, they have access to the full power of an Autotask license, and can be assigned to work on project tasks and tickets. Typically, they are an employee or contractor of the customer organization, and the MSP cannot bill for their labor.
Yes.
When we first set up your Autotask instance, we create a resource account for your Autotask champion, who will then need to set up all other internal resource and co-managing user accounts. All internal resources and API users will appear on the Resources page, and all co-managing users will appear on the Co-managing Users page.
The Autotask Administrator is a system resource with administrative security permissions. When system actions occur where there is no identifiable initiating resource, for example the firing of a workflow rule, they will be attributed to this system resource. It does not count as a licensed resource. To prevent changes, all menu options are disabled for the Administrator, Autotask system resource.
Cooper Bot is a system API user that appears as the actor for workflows that are automatically initiated (triggered) in other Kaseya IT Complete modules. There is no charge for system resources, and they cannot be edited. To prevent changes, all menu options are disabled for the Cooper Bot system resource.
The Cooper Bot avatar appears in the Activity feed associated with notes generated in other IT Complete modules.
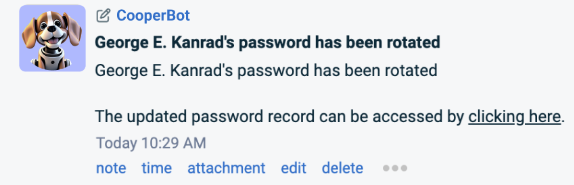
The notes are pulled every 15 minutes from KaseyaOne, Datto RMM, and IT Glue.
For more on Cooper Bots, refer to Cooper Bots.
A resource ID is generated by Autotask. It is a permanent, unique identifier that can be used to track resources. It is displayed in the Resource ID column on the Resources page, and next to the resource's name when viewing a resource on the Resource Management page.
The resource ID can be used to copy the settings of an existing resource to new resources during resource import. Refer to Populating the Resources import template.
The Resources and Co-managing Users pages display a read-only License Type column that is visible nowhere else. The license type is the basis of all security levels. Autotask security levels may be based on the following license types:
- Administrator
- API User
- Executive
- Professional
- Team Member
- Contractor
- Co-managed Help Desk
- Time & Attendance Only
- Dashboard User
EXAMPLE You may have several kinds of System Administrator licenses, and they are all based on the Administrator license type, regardless of your naming conventions. It helps us troubleshoot security level-related issues.
Kaseya uses license types for billing purposes. For example, we do not charge for API User license types. They also play a role in security, because they control a security level's access to the modules.
Managing resources
Autotask Resource and API User accounts are created and managed on the Resources page. Co-managing users are created and managed on the Co-managing Users page. To quickly find an existing user, use the filter row below the column headers.
IMPORTANT To preserve data integrity, resources and users cannot be deleted from Autotask. If a resource leaves your local organization or no longer needs to use Autotask, deactivate the resource.
| Tool Button | Description |
|---|---|
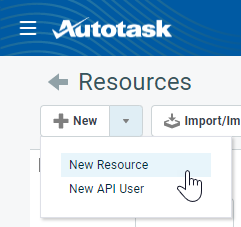
| New (Resources page only) |
Click the dropdown selector and make a selection.
|
|
New Co-Managing User |
Clicking this button will open the New Resource Wizard - Co-managing User page where you can add an external user who is not an employee or contractor paid by you. Refer to Adding or editing a co-managing user. |
| Import/Import History (Resources page only) |
Opens the Resource Import History page. For details on importing resources, refer to Populating the Resources import template |
|
Export |
PERMISSIONS By default, Export is available to users with Admin security level and disabled for all others. It can be enabled for other security levels. Refer to Can export Grid Data. NOTE When exporting to CSV: To ensure consistent date/time formatting in the CSV output, we strongly recommend that the user’s date/time format settings in Autotask be identical to the Windows date/time format settings of the computer performing the export. This will prevent conflicts in how the software that generates the report interprets the date/time format.
NOTE Note that only the selected columns of the first 5,000 records will be exported. IMPORTANT The export file does not contain all fields that are required to re-import the data using the data import templates, and the data headers do not match. |
|
Show Inactive |
By default, only active resources and users are displayed. Click this button to also display inactive resources or users. |
| Find Resource (Resources page only) |
Search for a resource who fits a skills profile. Refer to The Find Resource wizard. |
|
License Management |
Clicking this button will open the License Management page where you can view the active number of licenses within your database. Refer to License Management for more information. |
| Menu Option | Description |
|---|---|
| Edit | Refer to Adding, editing, or copying a resource and Adding or editing an API user. |
| Activate/Inactivate / Activate/Inactivate Selected Resources | Refer to Inactivating and activating resources. NOTE The table displays the name of the user who last activated a resource, and the last activation date. It defaults to the resource's Timesheet Start Date. IMPORTANT |
| Copy |
Refer to Copying a resource. NOTE API user accounts and unmapped co-managing users cannot be copied. |
|
Find Similar Resources |
Opens the Find Resource Wizard. Refer to The Find Resource wizard. |
|
Convert to Co-managing User (only available on the Co-managing Users page, as long as the co-managing user has not yet been associated with an organization contact) |
Unmapped co-managing users were created before version 2022.2 of Autotask was released, and should be converted immediately to the new version. You can easily find a list of all such users here: Left Navigation Menu > Admin > Admin Categories > Features & Settings > Co-managed Help Desk > Unmapped Co-managing Users. Selecting this option will launch the New Resource Wizard - Co-managing User. The wizard allows you to either select an existing contact or create a new one at the selected organization. Refer to Adding or editing a co-managing user. IMPORTANT Converting an internal resource with a Co-managed Help Desk license type to a true co-managing user associated with an organization contact cannot be undone. IMPORTANT Note that this will clear their AuthAnvil settings if they were using that, and force them to use an authentication code. |
|
Remap Co-managing User (only available on the Co-managing Users page for co-managing users who are already associated with a customer contact) |
This option allows you to transfer a co-managing user license to another contact at the same organization, the parent organization, or another sub-organization, or a completely unrelated co-managed organization (not recommended). For all the implications when you do that, refer to Remapping a co-managing user to another contact or organization. |
| Email / Email Selected Resources | Email one or more resources. This right-click menu option will open your default email application, with the email addresses of the selected resources populating the To: field. |
Remapping a co-managing user to another contact or organization
Licenses assigned to co-managing users can be transferred to another contact and even another organization. This feature allows an IT resource to move between the parent organization and its sub-organizations, without having to deactivate their existing co-managing user account and creating a new one. This is important because the same email address cannot be used in more than one account, even inactive ones.
This has the following advantages:
- You do not have to deactivate the existing co-managing user and create a new one at another sub-organization
- Billing will continue without interruption
- Everything configured on the Co-managed Setup page remains in place
- Tickets and tasks assigned to the co-managing user remain assigned
You will simply link up the Autotask license with the person's contact record at the other sub-organization.
IMPORTANT It is technically possible, but completely unadvised, to transfer the co-managed user license to an unrelated organization and contact. The co-managing user account will remain associated with tickets and tasks that were assigned to the user before the organization change, and must be cleaned up manually. The user will also remain on any teams they were on before the transfer, giving them account manager-level access to the organizations the old contact was associated with.
To re-map a co-managing user, do the following:
- On the context menu, select Remap Co-managing User. A dialog box will open.
- Select the organization the new contact is associated with. All co-managed organizations are available. If the selected organization is a sub-organization and the parent organization is also enabled for co-management, contacts from parent organization appear as options in the Contact data selector.
- Select the Contact the co-managing user will be mapped to.
The new contact's data (name, email, etc.) will become the co-managing user's data.
Additional tools for resource management
- You can import resources, using an existing similar resource as a template. Refer to Populating the Resources import template.
- You can define Time Off Policies to manage paid time off benefits granted to your resources. Refer to Managing time off policies.
- You can track skills, degrees, and certificates your resources have earned. Then, when you need a certified technician to perform a given task, you can use the Find Resource Wizard. Refer to Managing certificates, degrees, and skills.
- If resource productivity is something you track closely, you can define a weekly billable hours goal for your customer-facing resources. A number of reports allow you to compare the goal to the actual number of billable hours. Refer to Establishing weekly billable hours goals.
- You can create cross-departmental teams called Workgroups that can act as filters for the Workload report and the Dispatch Calendar, and give the Workgroup leader visibility into all the projects of the Workgroup team members. Refer to Managing workgroups.
- You can limit which other resources in your Autotask instance a user can see in picklists, resource selectors, search tables, etc. You can determine if they only see resources they share a line of business, active account, department or workgroup with. Refer to Limiting resource visibility.


